

Cabin’s Hardwood Floors Beautifully Transformed
- Home Case Studies Cabin’s Hardwood Floors Beautifully Transformed
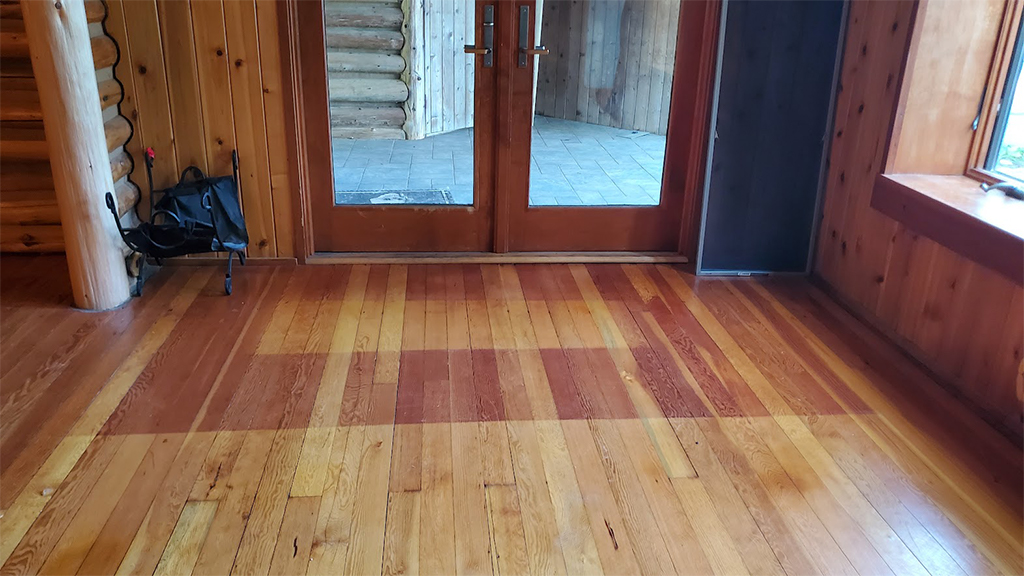 This pine floor is severely sun faded and needs sanding and refinishing to fix the sun fade
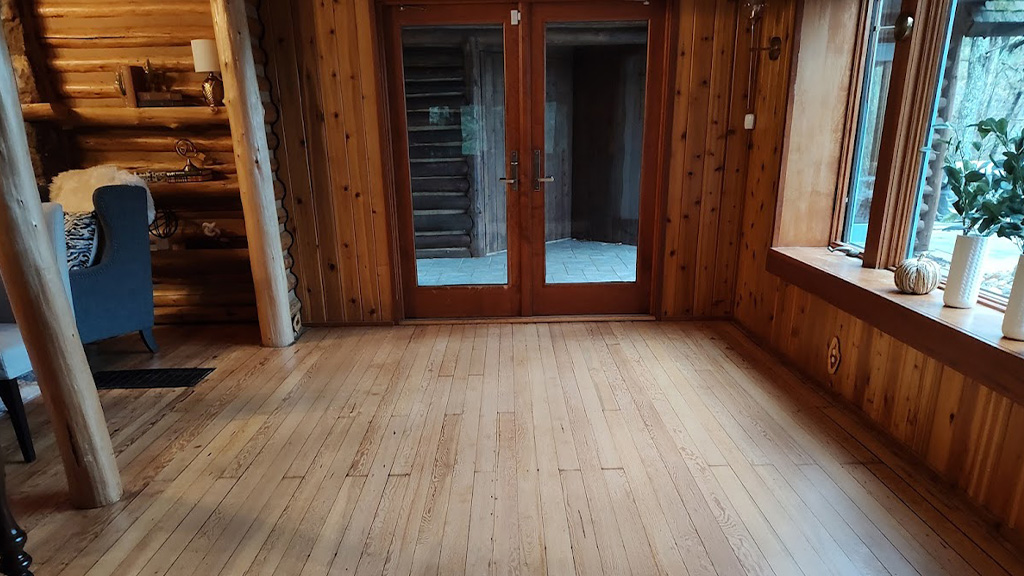 Compare this to the old sun faded condition appearance we started with on this pine floor
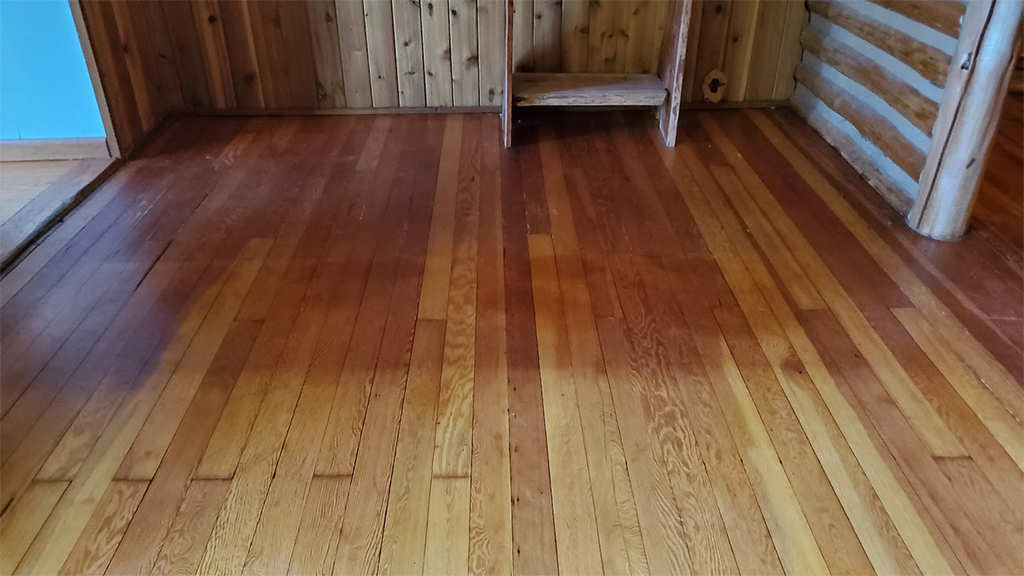 This is the sunfade of the opposite end of the lodge room dining area, pictured prior
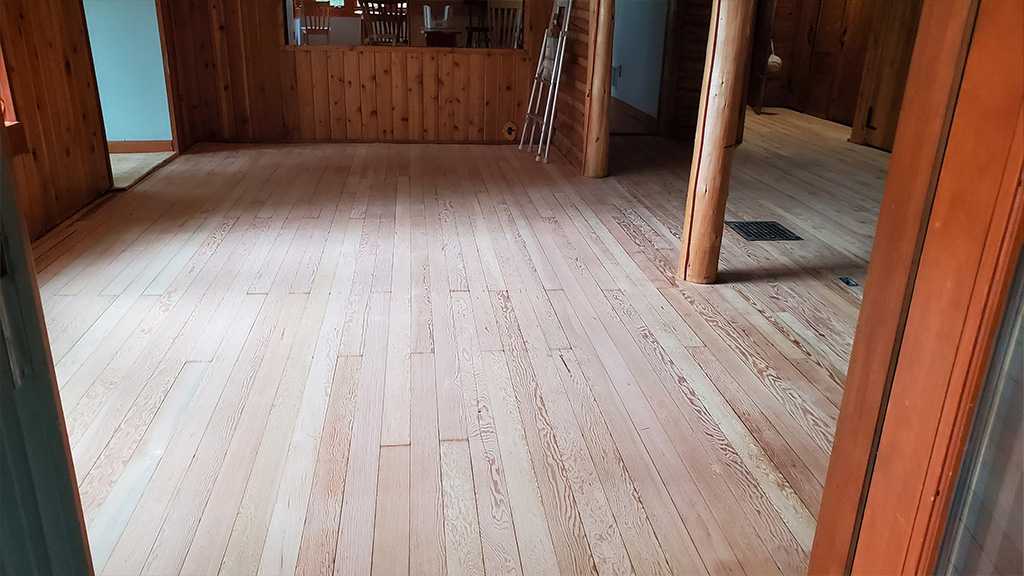 Here the finish is sanded off, see the difference in the area to the left compared to the right, will be a challenge to get the color close
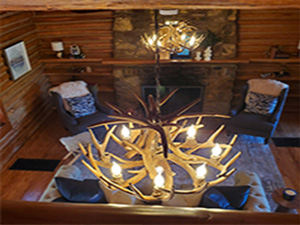
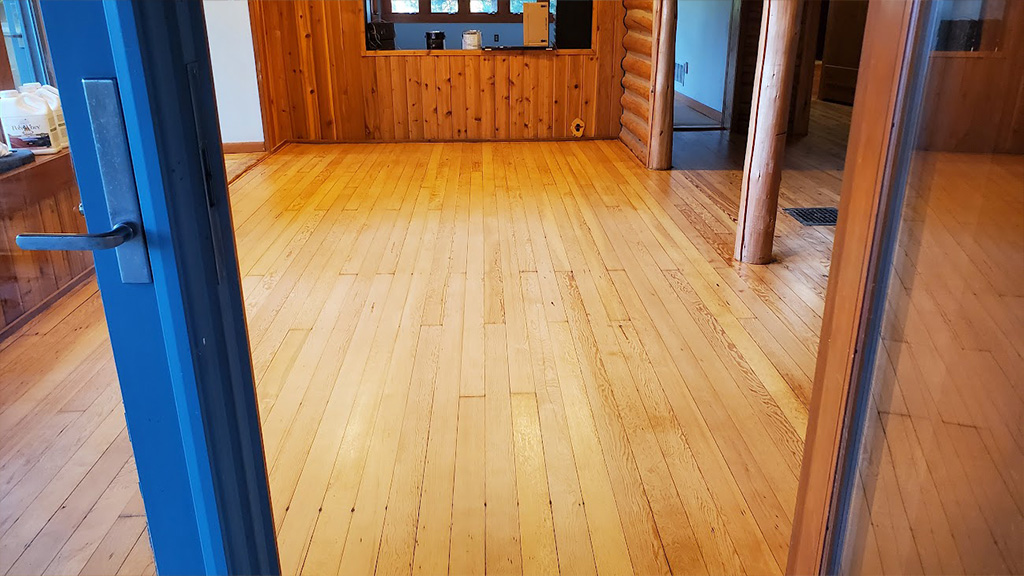 With lighting poor, this floor's finish is fresh, and blends well with the older heartpine, and the wall paneling
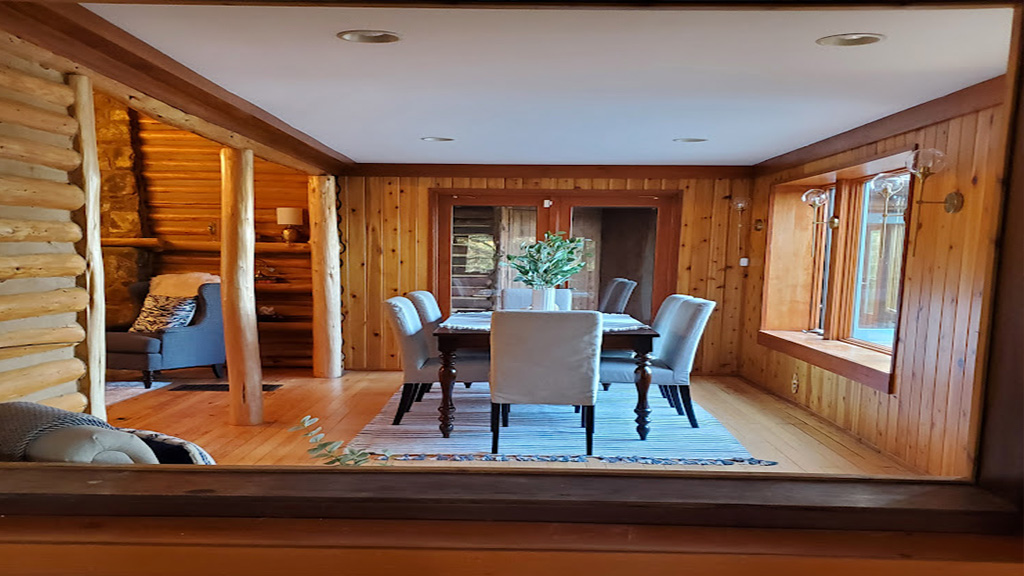 Look how inviting this room with pine floors is now
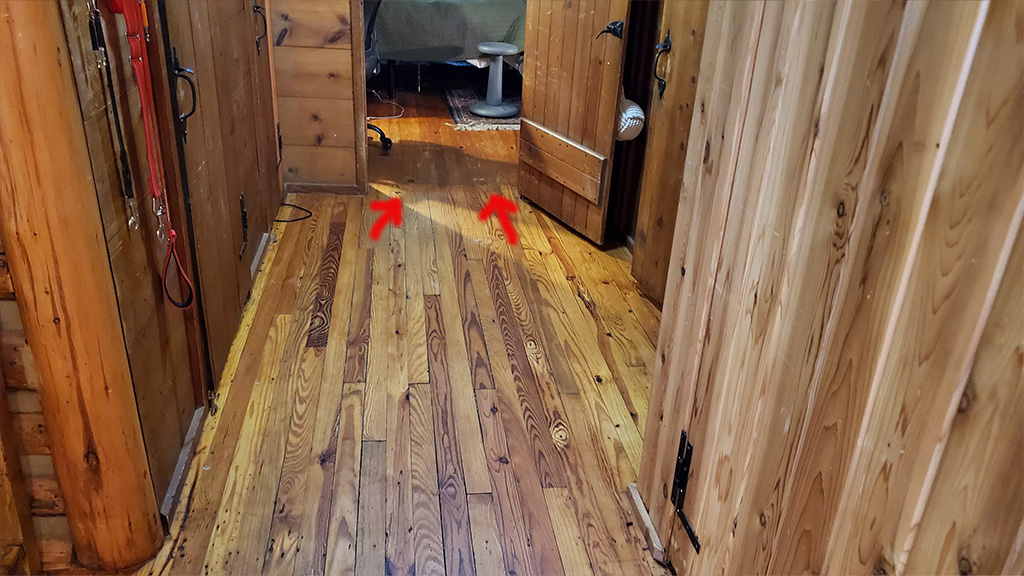 See how dark the bedroom pine aged compared to the hall
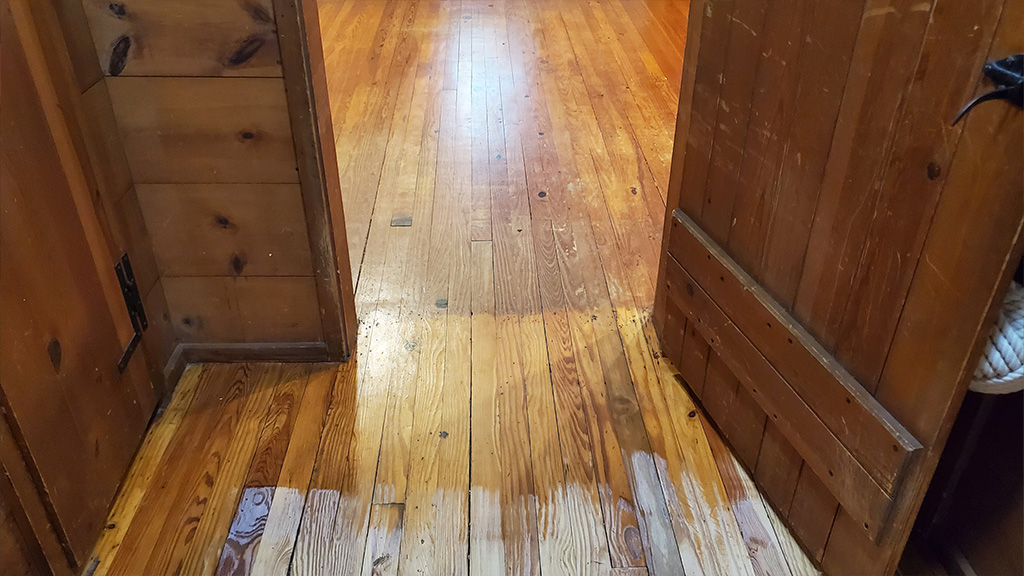 Inside the door the pine has aged darker, but we are only sanding off to the door
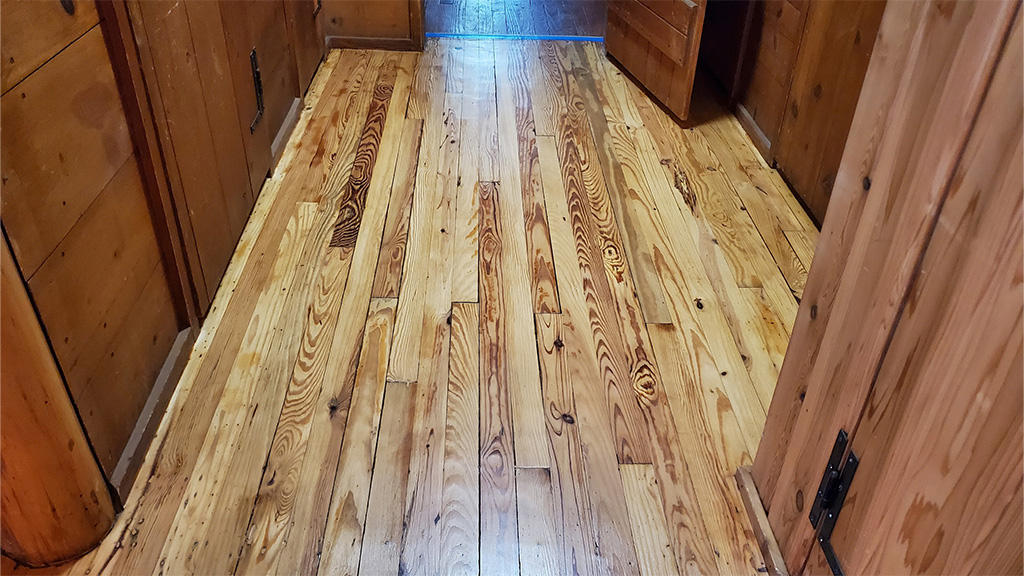 There is quite a difference from before we sanded this hallway, especially compared to the bedroom
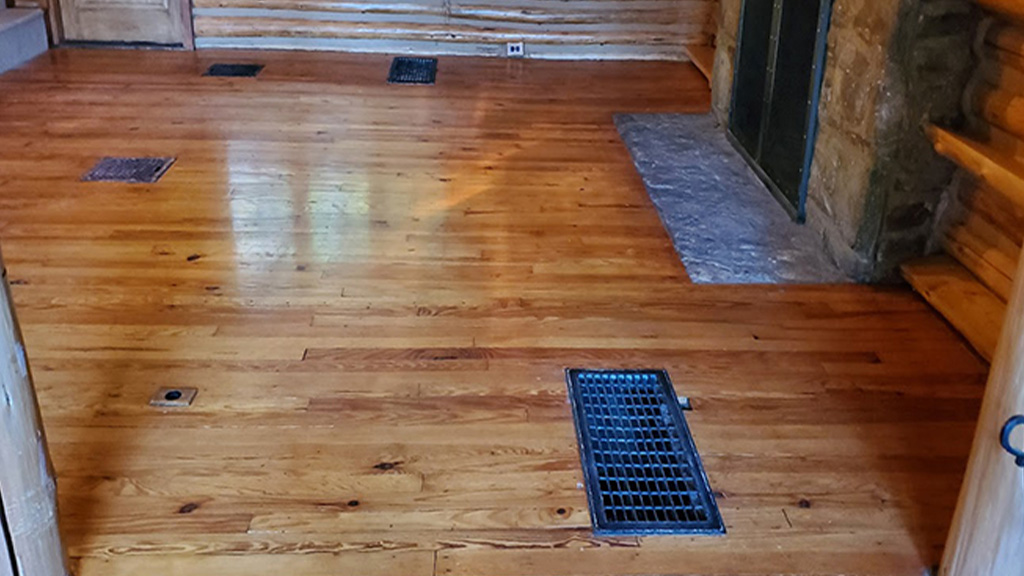 Once refinished this old, yellowed pine floor will have lasting years of beauty once again
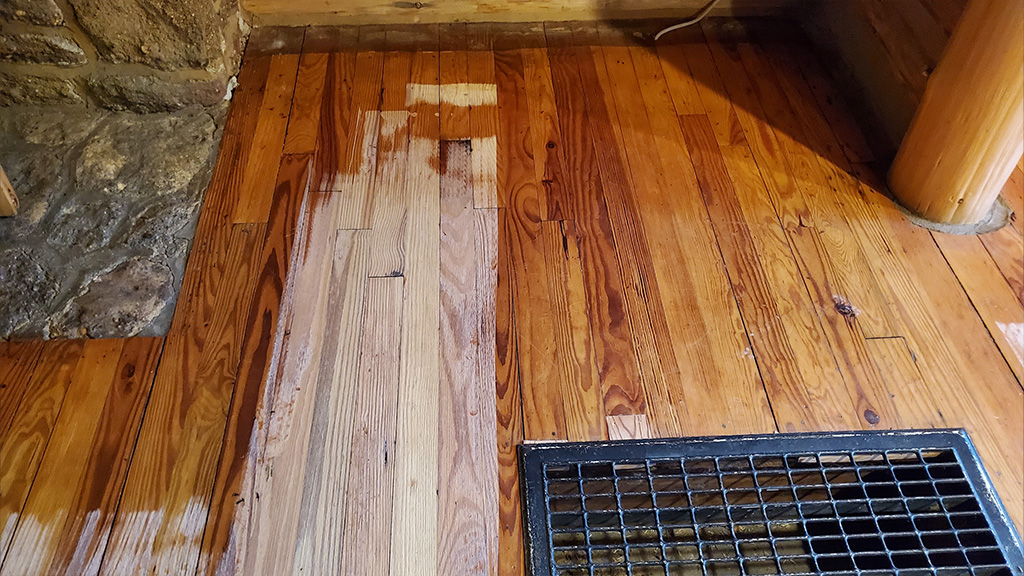
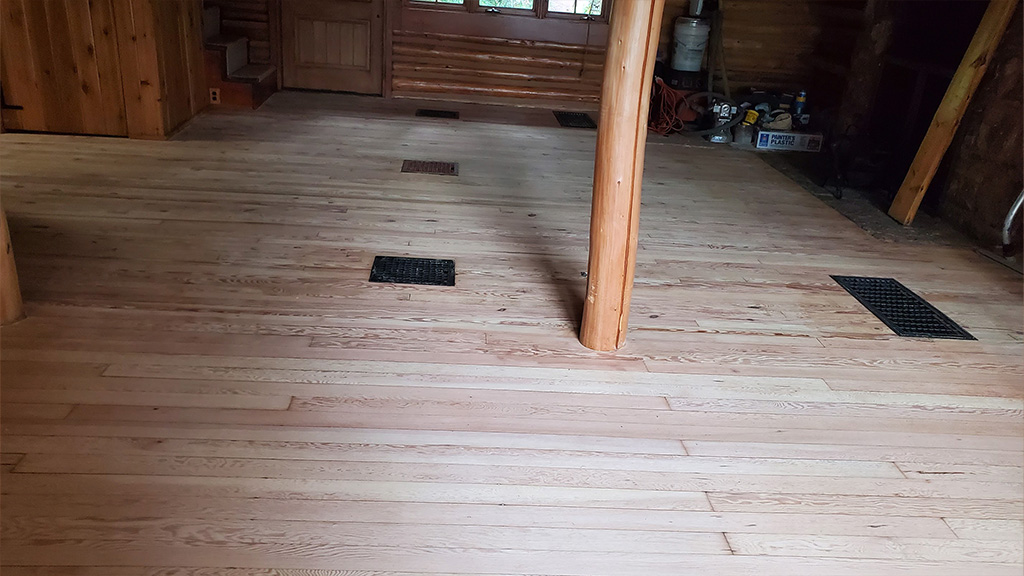 With the finish off this heart pine will soon look fresh and gorgeous again
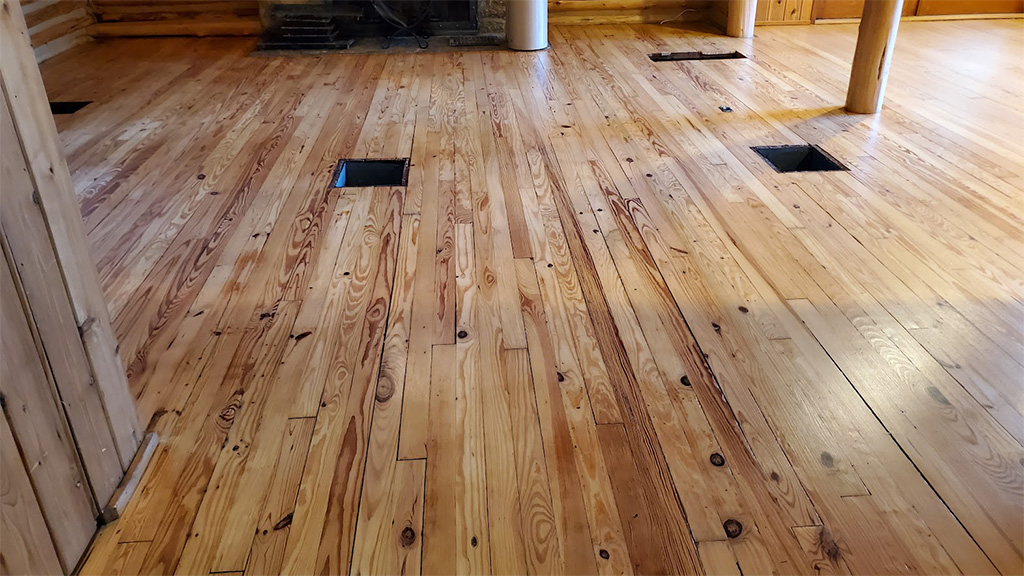 The lodge room's heart pine floors are refinished and the old yellowed finish is gone
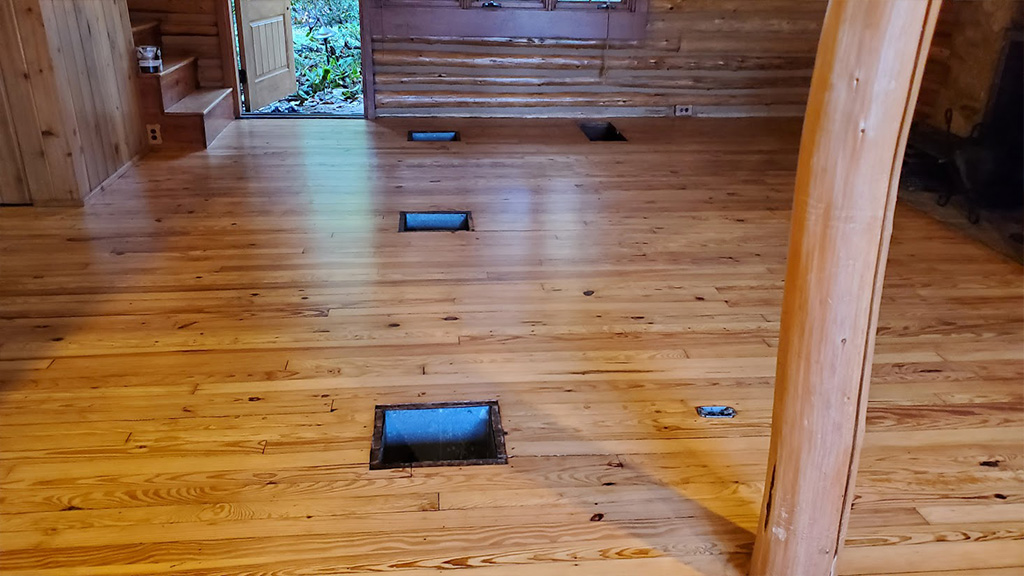 The refinished lodge room is brighter, and no longer old & stale looking

- Location Medford Lakes, NJ
-
Job:
Sanding and restoring 100+ year-old vintage pine floors
Saying goodbye
Long time Medford Lakers’ family moves to Florida to follow dreams of Wake Board fame for young daughter on the US Wakeboard team. Leaving Lake Life’ behind they won’t forget their cabin coziness, but its time for their unique home to welcome a new family.
It is a prominent cozy cabin with a commanding view, perhaps the best in all of Medford Lakes. Perched high up off the water, and tucked near the woods, it has a camping vibe and or lakefront retreat kind of feel. Life’s definitely ‘a porch swing’ for the lucky buyer willing to shell out for this crown jewel with spectacular views!
The problems.
With multiple challenges for this project we are focusing on the “lodge room,” which had its issues. Vintage 1930’s the original lodge room has heart pine floors. This rarer species of pine in optimal condition has magnificent coloration and detail within the grain. But when expanded the added section is other pine, and looks quite different. This pine is not heart pine, and has less coloration. And, it was installed differently, even noticeable when looking closely. So migrating them to look more even would take some work.
The challenges
Besides the hardened and dated color and some lingering issues there was a lot to tend to. These ratty floors needed love. Finally they would get some attention. Furthermore, with all different age and variationf of the pine it would be c challenge to make everything as cohesive as possible. Here is a list of things needing done:
- old dated – tired lodge room and kitchen needs repairs and refinishing
- some pine boards need repaired, stabilized and or replaced
- splinters need to be replaced
- boards with copper pipe holes need to be replaced
- scratches need removed
- and the Master hall transition area needs a trip hazard fixed
And last but not least, there was loads of can’t get away from it ‘orangy’, amberized and old dated pine that was screaming for help!
Part 1- Repairs
The repairs got done first. The bouncing board in the dining area was stabilized. New boards were weaved in to remove the abandoned copper pipe holes. Wide gaps in boards were filled (more cost effective done in less time). Essentially this cleaned them up without the additional cost of seeking out vintage pine material. The major splintered board was replaced, no longer a danger in a prominent traffic area.
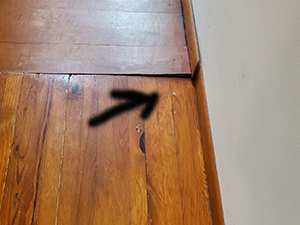
More repairs were done in the Master. Oddly enough there was a board in the master bedroom hall that had peaked on one side and was a trip hazard. The board stood bout 1/4-1/3″ above the other boards on one end. Looking wonky it was also unsafe, and detracted from the nuiance of the room with a magnificent view overlooking the lake.
As the sanding began it quickly became ‘dancing contractors’!
With much to do to ready the house we were greeted by Jill, a home stager-interior designer. Revealing 2 painters were soon coming and the exterior cabin pressure washing team was also scheduled. All had to coordinate and be flexible with one another (quite a feat)!
All seemed to work well except the exterior cabin pressure washing.
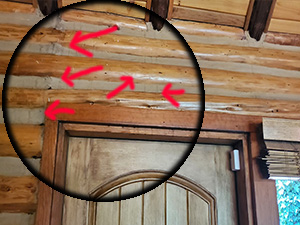
Some really shaggy sections of the logs, mainly near the north master wall were and did pose a problem. But so did other areas too. Evidence Because there was moss in some areas it was suspecting that there might be water leakage. For an in depth account of dodging rain drops, puddles, drips, and buckets click here→ Dueling Wood Jobs.
Part 2- Dodging Potential Water Damage
Problems and schedule interruptions caused us great angst in getting the floors refinished. Start and stop. Holding our breath and keeping calm we had to work to prep the floors, then protect them from the other contractors.
Almost a recipe for disaster, we did manage to keep our work moving and fix the blemishes caused by the pressure washing.
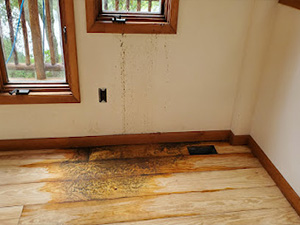
As they worked around the exterior we did experience some leakage inside, as depicted in both these pictures.
First it came in in the kitchen area, then in the main lodge room. The stairs also had moisture, then the family room, and the master did as well.
Part 3- Final sanding, staining and refinishing.
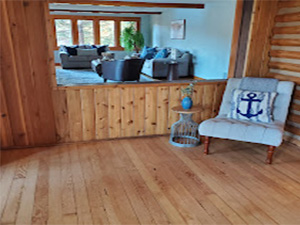
Finally the floor sanding resumed and corrected the water leakage. First to be finishes was the family roon. .
The family room was first. And after a color hiccup we adjusted, by adding tint to the pine floor so it matched the heart pine better. for more about the hiccup >Click here for more about the color hiccup and how it came out.
Namely after removing the old finish the raw wood is much lighter, so not staining it will result in a much lighter tone, and probably unacceptable because you are matching other wood tones, namely the trim and doors, in the house.. So to match color you have to be careful and build it slowly.
Final approvals of color ensued in the lodge room, and we were cleared to complete the finish coats.
It was a tricky balance to add enough tint to “age” the newer pine in the formal dining area so it blended with the older heart pine in the living area in the lodge room. Click here for more about “Love’n for Lodge Room Floors”. To that we had to also add enough tint so it tied in with the log color, the trim color and the paneling color. Picking a happy medium, we insisted the interior designer approve the color in person. (Pictures sent via text did not do it justice, the persuasion of light, flash, or lack there of just threw the color off. Seeing it in person, we got our final approval.)
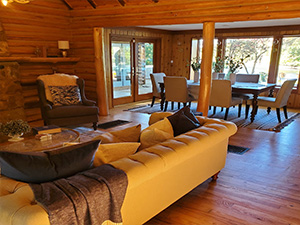
The cabin lodge room is finished with a cohesiveness in color blend and finish.
All dressed up this room has the cabin vibe temptation to offer a lucky buyer! There is no question that the lodge room is fresh, inviting and gorgeous once again. Adding the staging touches, the room is the focal point in the home and will entice buyers for sure! See how nicely the staging is to attract buyers.
Next was the stairs and the master bedroom.
Some color was added to tint the stairs. And with a close up, the soon to be installed new runner would likely calm down the permanent stain in the stair corner.
On the final stretch we tackled the master bedrorom. Kind of nestled as if it has a “tree house” vibe, the master is now a cozy retreat awaiting the lucky owners who will call it home.
And the homestretch, the kitchen and we were done.
We finished the last of our tasks, in the kitchen. The tint was added to tie in the color with both the family room (of a different generation of pine), and where it touched the newer pine in the lodge room formal dining area.
Only thing left was installing some protective Ramboard™ across the main areas in the lodge room and in the downstairs hall leading up from the “turtle room” out clear to the front entry. Fearing a potential disaster while extracting the turtle and turtle pond in the downstairs bedroom, our precaution served us and our client well.
Disaster averted with careful planning.
After all we had been through doing damage control with the pressure washing, and the other contracting within the cabin, we did protect the floor. Hearing about an inevitable “turtle extraction” we had great concern. Removing a turtle pond located in the downstairs bedroom was necessary, but poorly timed. But it had to be removed to make it buyer friendly.
The turtle would move on to a new home, and the turtle pond liner and perch had to be disassembled and removed. Knowing it would not fit going out the window, we feared that water might spill from the pond liner on our newly finished and vulnerable floors. As we feared, if left unprotected, the main traffic lane in the lodge room would have been damaged.
But the Ramboard™ took the hit of the water spill, and the floor was unphased!
Despite reassurance that the turtle extraction would go off without a hitch, it did not. Click here to read about the turtle extraction. There was a spill of water left on the Ramboard™ covered floor. Spilling it directly on the newly finished floor would have damaged the wood unless it was cleaned up immediately. And allowing it to sit overnight, well the damage would be certain. So not leaving anything to chance we covered the floor and kept our fingers crossed.
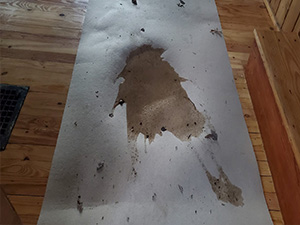
I peered through the window and saw a major puddle on the Ramboard™. I gasped as we opened the door.
Solely on the protective board, but square right in the main entry traffic lane was a substantial puddle that had absorbed into the board. Much had gathered and laid on top. We carefully removed it, and found a scant film of moisture on the wood that laid on top of the finish. It did not impede the finish, and merely wiped dry with the movement of our sock.
There for our final coat of the kitchen area, we replaced the soaked Ramboard™ with a fresh piece. We covered the master and the kitchen, so that all rooms that were to be painted had protection on the floor.
Done! The cohesiveness flows nicely across the wood floors throughout the house.
Now that our work was done we were very pleased that we restored the old, dated, faded, stale and damaged hardwood. The color and finish now flowed from room to room, and the trauma the floors experienced was all fixed.
Although a few rooms were left as is, it is the hope that the buyer will swoop in and have us revitalize the remaining rooms. On the final list would be the turtle room, the upstairs hallway and 2 upstairs bedrooms.
Bowing off the floors, we handed them confidentially back to Jill, the designer to work her staging magic!
Time to pass the baton to the painters who were returning to finish the painting upstairs. We also checked with Jill who be last in to stage it. A new kitchen light and comfy and cozy furniture was the final task.
We are certain this transformation will get the attention of a lucky buyer who will cough up the dough!
This job was a pleasure to be a part of! Fingers crosses we get to refinish the rest of the floors for the new owner!
Is your cabin in need of hardwood repair, removal the dreaded yellowing with refinishing or updating? Call 609.953.0472 or Contact Us on line and we will reach out to you!