

When Wall Color Plays Tricks On Your Hardwood Floors
- Home Case Studies When Wall Color Plays Tricks On Your Hardwood Floors
 With more light in the room than most times she chooses a lighter gray, although called "dark gray."
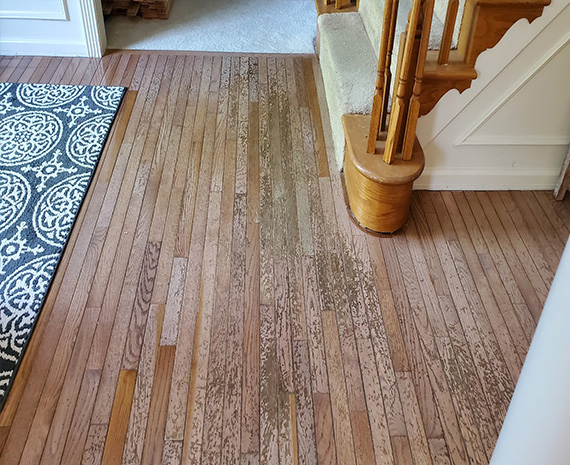 This is what the damaged foyer looked like, and you can see the carpet still in the living room.
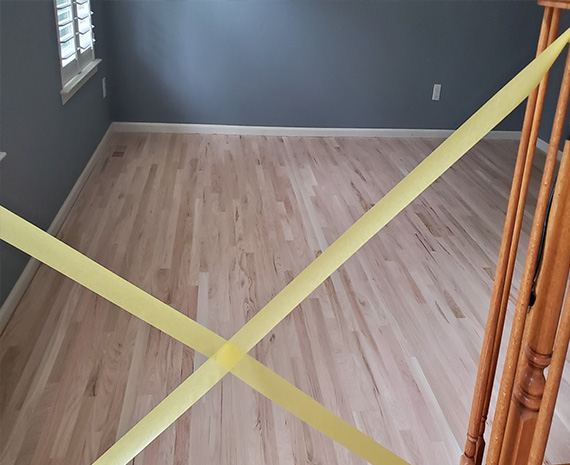 Before the stain you see a peak of the wood and the dark walls soon to cause color confusion.
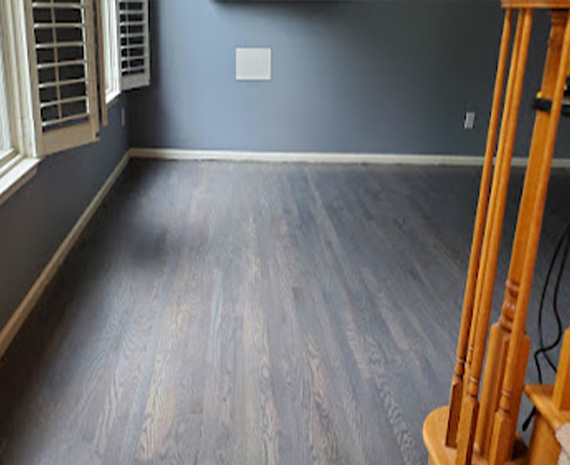 Brighter near the window, looking to the right is gets really dark.
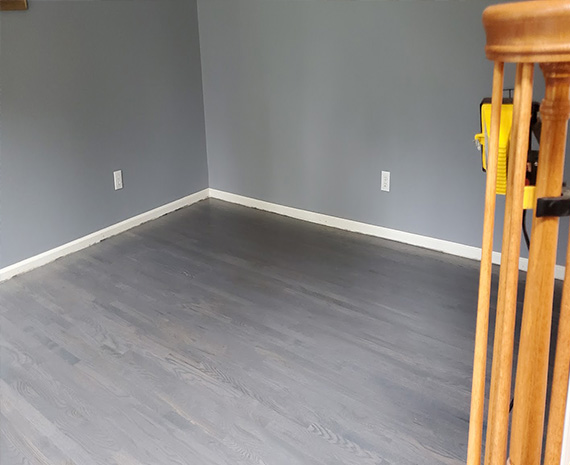 At night the color looked nearly black.
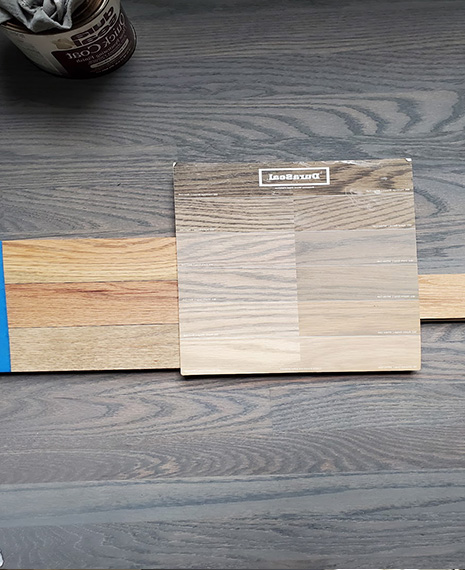 Looking at the sample chart, her choice there is lighter, the floor looks much darker.
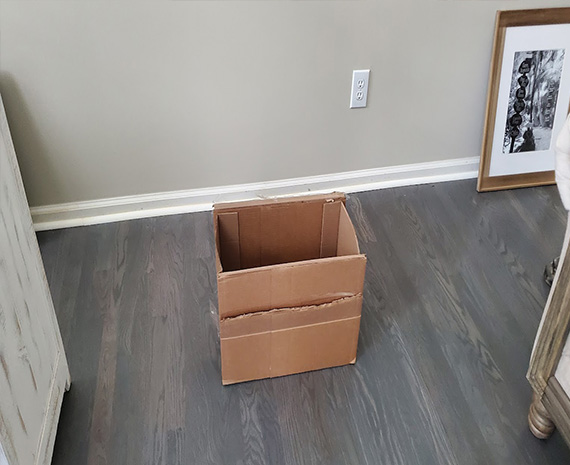 Used earlier before the walls were painted this the color shadow that solved the problem with the stain.
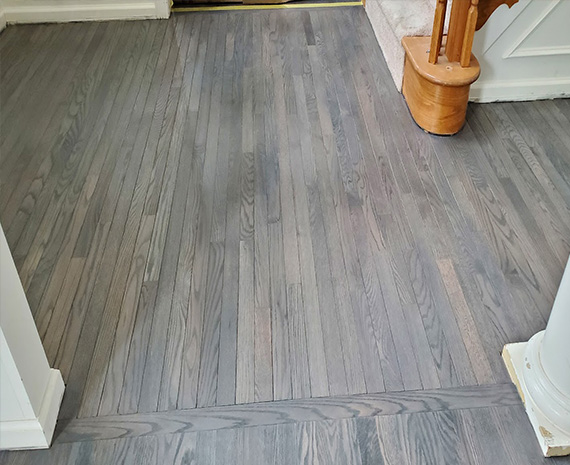 Finally the color is a perfect match to her choice which she loved!
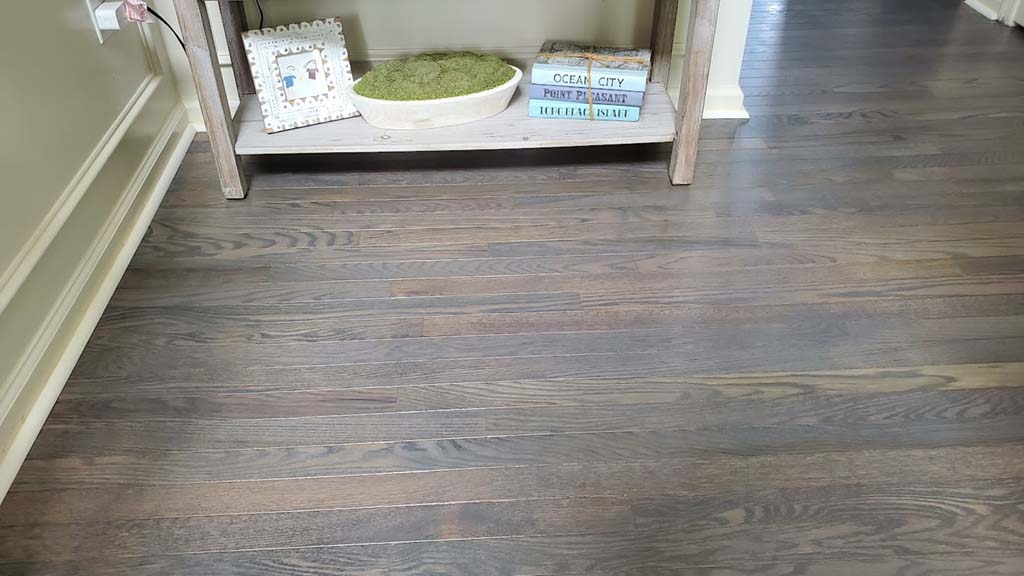 Starting with a damaged, blistered and blown finish, this hardwood floor is has beach tones and is gorgeous again
- Location: Lumberton
-
Job
Residential Hardwood Floor Refinishing
Can Wall Colors Trick Your Floors? Or rephrased, can color play tricks with your mind?
Here’s More About Surfing A Refinishing Adventure. . .
The answer is yes, and we found out without asking how color influences can play tricks on you!
Our adventure begins
We spent two weeks repairing, installing some new wood in the dining room for Kim, a new customer. Preparing almost her entire first floor we were soon ready to apply the stain and finish. Her vision was simple: turn her sun-faded, scratched red oak floors into sleek, gray driftwood- inspired beauties. Her beachy decor of blues, whites, creams and steel blues was ready for the transformation.
Kim, referred by a happy neighbor, trusted us from the start. The project was a home makeover, a gift from her husband to celebrate her retirement. New cabinets, counters, walls, lighting and furniture updates were underway.
Personally we hit it off! But wouldn’t want to rock her boat—she’s a retired cop in top shape! A great gal, we were sure we would give her her dream floors!
The Work Began
While working with her it was a relaxed vibe, kind’a like taking a long walk on the beach after reuniting with an old high school. And our every step of the way had been spot on. We couldn’t have made her more happy or more impressed with our craftsmanship. (Marvin’s of course)As usual he gave it every attention to detail. Also, as always he worked with respect of property and family, and gave exemplary customer service along the way.
The stakes were high, not that they ever aren’t. But wishing we could fulfill the gift perfectly for the retirement well earned it was all hands on deck to deliver her, her dream!
So organized as a test launch, we set out to do the living room first.
An Unexpected Problem
The wood was installed and we could stain and refinish it as a stand alone project. And luckily we had a break point in the floor because there was an opposing angle to framed them out separately. That way we could see the outcome there first, before doing all of the rest of the first floor.
The idea was to give us a “first look.” But talk about getting sand in our eyes (couldn’t resist)!
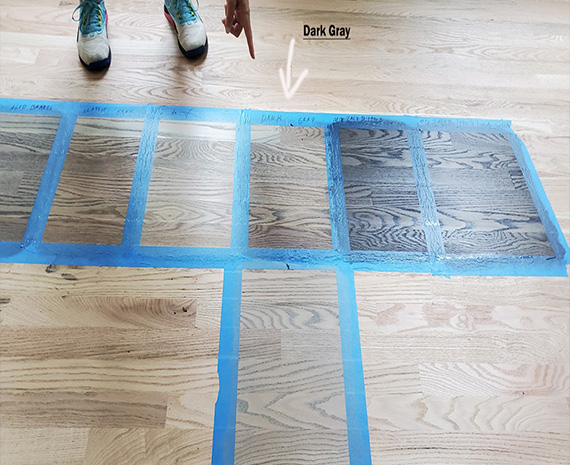
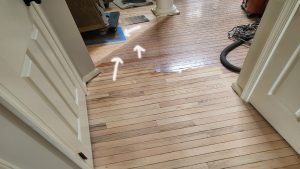
Before the stain, Marvin meticulously prepared the living room floor. We were careful in providing
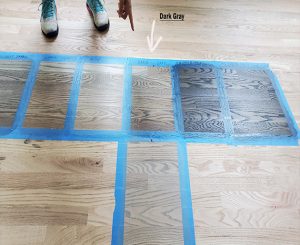
stain samples in that room (but on a small scale). As pictured she made her decision (as you can see in the picture). Extremely excited she couldn’t wait to see the room done.
So on with the first look- in the living room the project took a deep dive!
But all stained, something was wrong! Our mutual excitement took a real dive! Although the sanding was proper, and not affecting the color, something else was! That gorgeous dark gray stain appeared more like a “battleship gray” rather than the rich, grainy finish she expected. And panic ensued!
Now The Investigation
Both keeping calm but with a little breath holding we assure Kim we would retrace every step and get to the bottom of it. Kim kept calm and assured us she knew we would make it right. (After having a career where you “read people” for a living, she was trusting her gut we wouldn’t let her down. And, she was right!)
Reviewing every step, or should I say footprint we questioned everything until that moment:
- Did we use the wrong stain? No, we called and grilled the stain manufacturer. Luckily the rep we spoke with was a licensed wood floor expert who verified everything up to the stain was correct. And in conclusion the stain was spot on with the samples used for her to select.
- Did we prepare incorrectly? No, Our tech Marvin followed every procedure according to the refinishing standards. And while this is where color can be affected due to poor sanding and prepping technique, nothing was red flagged there either. In fact Marvin, as we do in every job water-popped the floor to open the grain of the wood, and to reveal blemishes in the sanding the naked eye cannot detect.
- What else could be causing this problem? Verifying all the above we took it a step furthers- we consulted with yet another industry expert, Bob Goldstein (Certified Wood Floor Inspector, Trainer, with 60 yrs experience in the business). He offered another technique to flush out the problem!
The investigation continues and the cause is revealed!
With a calmness to his tone Bob offered some color insight. Color influences can play tricks on other colors, enough to drive you nuts at times. Also advising us it can be so disruptive that not only do you doubt your choice, you might think you need to go to extreme measure like sanding it off. But he suggested– Perhaps the walls could be the culprit!
After asking some surrounding questions about the room we answered Bob that her walls were a slate blue. He suggested that the dark tone of the walls were messing with the stain’s appearance! But before re-sanding he told us to do a “color box test”.
With a little breath holding we did exactly that- we constructed a color box.
Again we a calm reassurance Bob said making a color “shadow” box is simple. Take a box, say a medium size (perhaps something like a 12″ x 15 X 10″ size or something like that). Cut off the top flaps, and the bottom of the box, so above the natural light fills the box, and below you see the only the floor color (and keep a high intensity light on hand).
By blocking out competing influences by surrounding colors, i.e. the walls, the true stain color will be revealed.
The results
Our trepidation relaxed like opening the flood gates! The color inside the box was exactly true to the color she picked. To confirm we had a sample board, prepared the same way so it wouldn’t sway any deviation, and the board and the area inside the shadow box looked dead on. Thank goodness!
Making doubly sure we did another sample in the dining room. You can appreciate that what was at stake was 1- pleasing Kim, and 2- avoiding the costly measure of having to re-sand the floor and completely change the stain color (that she really didn’t want to do, she loved the color she picked)!
The area was prepared precisely as the living room was, and the sample stain board went down. But the dining room had different
color walls. They were a light cream. This is a perfect second test that would revalidate that it was the slate blue walls in the living room that was the culprit. We proceeded- the second test confirmed the first test. The color was true to the shadow box color, as was the board sample too.
Then removing the shadow box in the dining room the color didn’t sway then either! We had our answer!
Turning Course
Re-sanding was not necessary, but a wall color change in the living room was. And although she wished she could keep the walls the original color, lightening the walls would preserve the color of the floors that she was absolutely in love with!
Easy enough. And we could continue as planned.
Mavin finished the job.
Now with the ‘kerfuffle” behind us Marvin plowed forward with an unwavering pace. All the remaining floors were sanded and prepped as precisely as the living room. Then to be sure he water-popped as well. No blemishes revealed, and with the grain opened he stained the floor.
To us, they were spot on!
Meanwhile Kim spent the day with co-worker buddies at the shore. With a relaxed day the sand, sea and comradery was just what she needed. At day’s end she would return home, by herself to see the results.
The Stain Results
Late that night Kim returned home. She admitted she tiptoed in with eyes half-closed, bracing for disappointment hoping not, only to be blow away! At midnight, which I saw early the next am I got a simple text—”Wow! ♥♥♥”
The heat was off (literally), the color was perfect and she was over the moon thrilled!
The Outcome
Kim was even more in love with her floors when we were all finished! The color was spot on, the finish made it look rich and beachy. It was now a contiguous blend in color (no more distinctly mismatched colors.) And, all the blistered sun fade was erased. These floors turned out gorgeous! To see more about the complete job click here>Refinishing Wood Removes Sun fade and Blends Color!
Along with our hard work Kim was also thrilled that the other updating met her dreams too. The cabinets were refinished and the granite counters went in. New lighting was installed, and new furniture was on the way!
What Kim Had to Say
“You guys are awesome, I just love my floors! And thank you for helping assure me I got the color I loved. You guys rock!”
But words speak loudly, but deeds go further: Kim handed Marvin a very generous tip ($200 bucks I think). And she paid great compliments to us on his work. She further referred us to her best friend and her mother as well. In fact, we had since done her best friend’s mother’s floors. Now there’s a funny wood refinishing story. To read about that click here>When wood and weed were mixed…
In closing she promised to sing our praises and share our name with everyone she could!
I’d say she was one happy lady!