

Aging and Refinishing For 100 Year Old Floors With Random Width Board Replacement
- Home Case Studies Aging and Refinishing For 100 Year Old Floors With Random Width Board Replacement
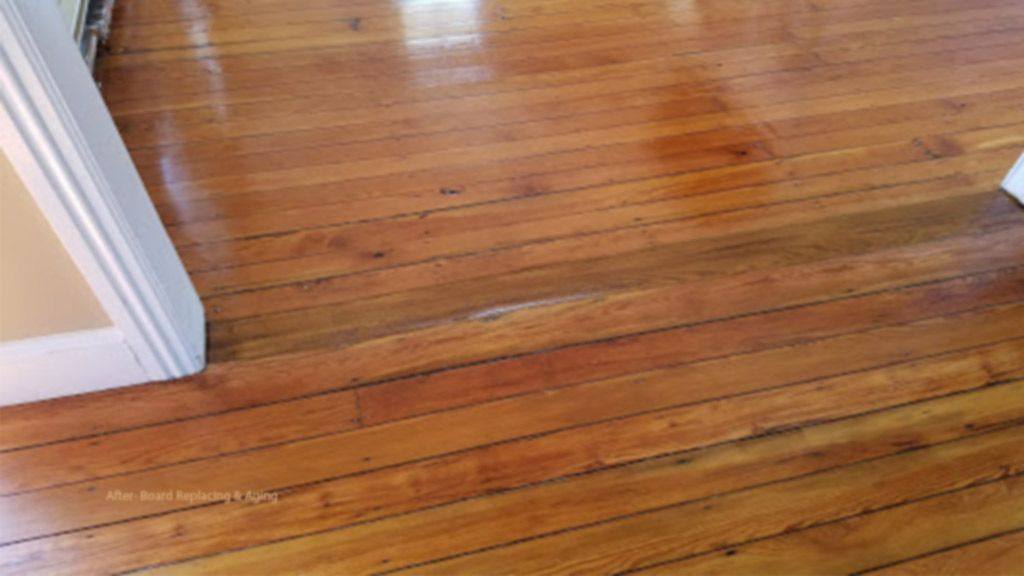 Transition board replaced to repair gap in floor
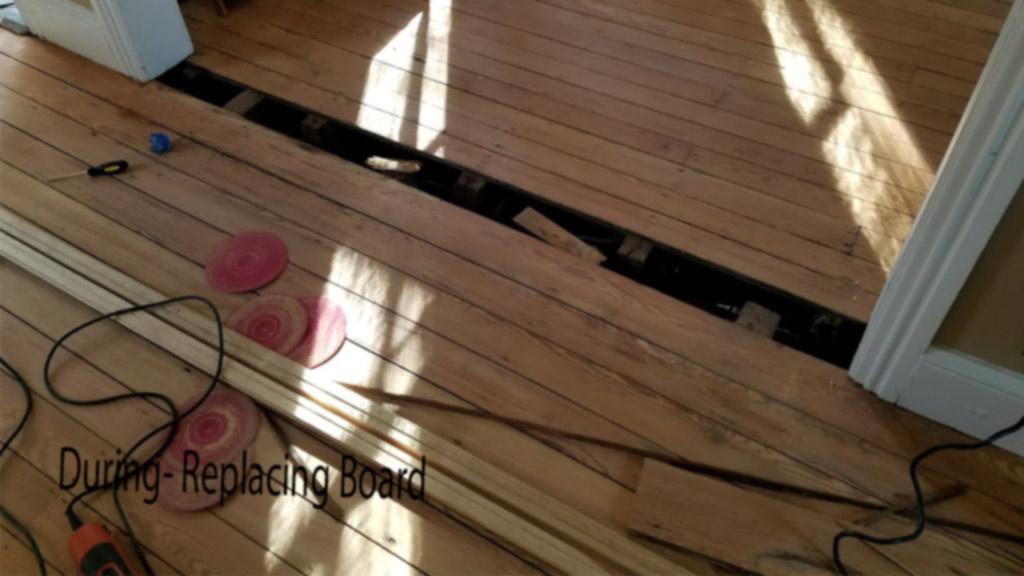 Medford Pine Floor During Board Replacement
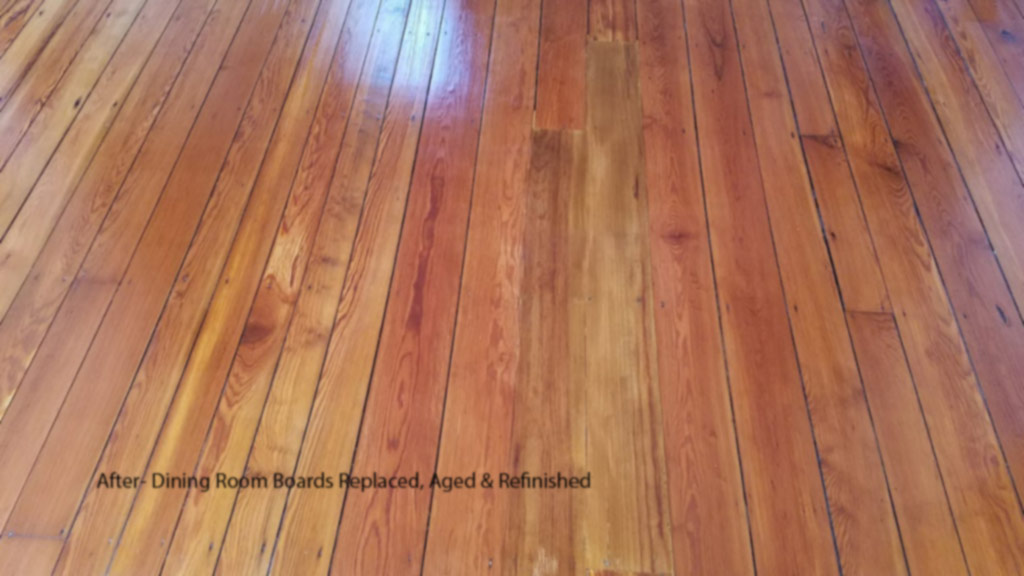 Old Damaged Pine Boards Replaced, New Ones Blend In Nicely
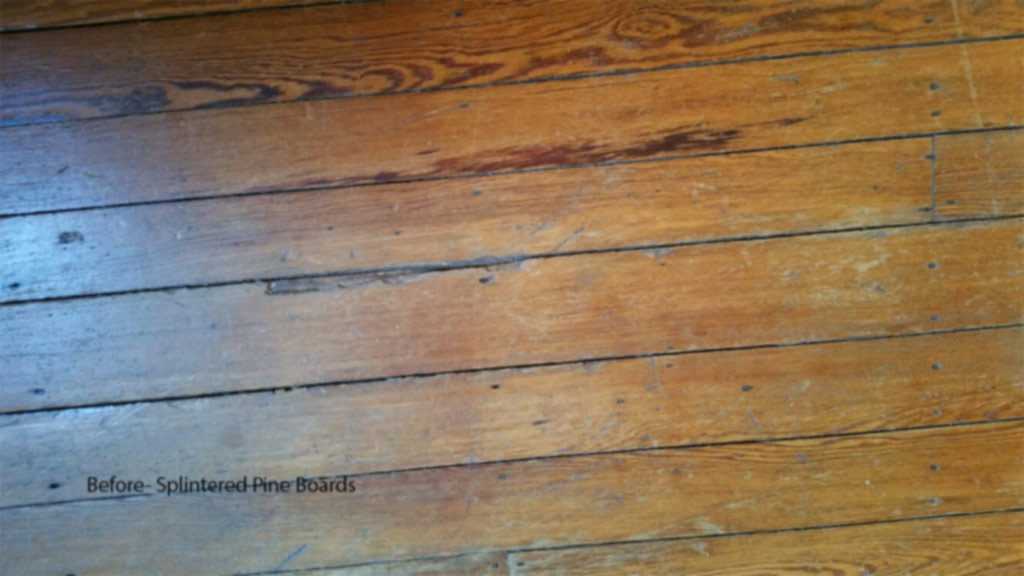 One of a number of damaged pine boards that gave this Medford Family splinters.
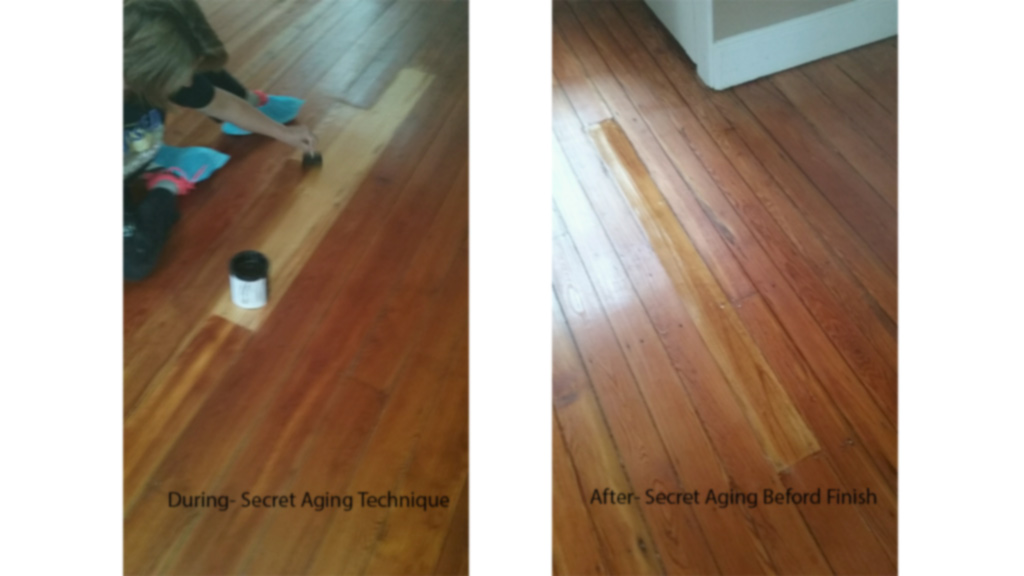 Medford Village Home's Heart Pine Boards Inserted, Aged to Match Color
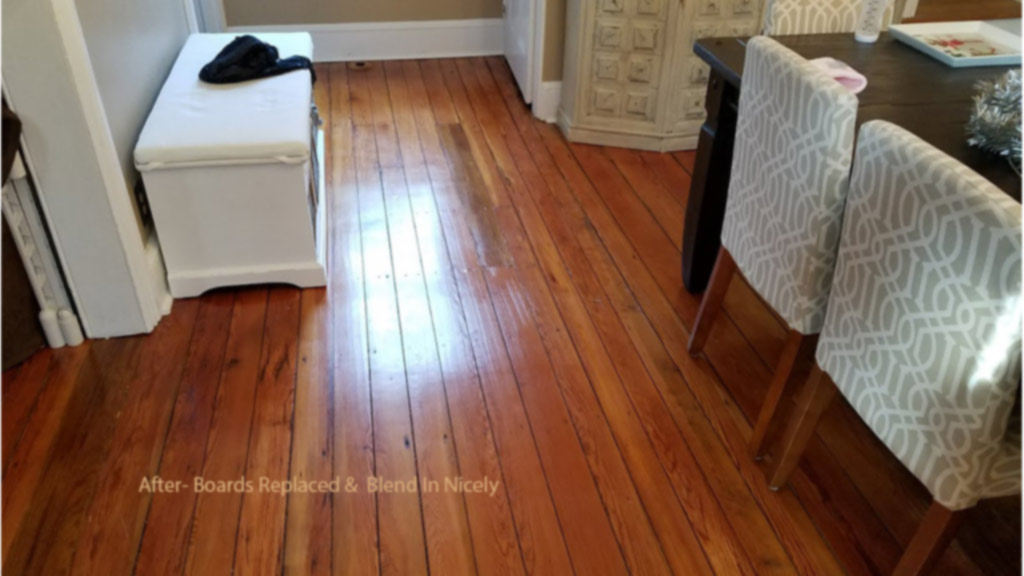 South Jersey Historic Home's Pine Floor Repaired, Sanded & Refinished
 Old Pine Random Width Floor Repaired, Pine Boards Cut to Fit
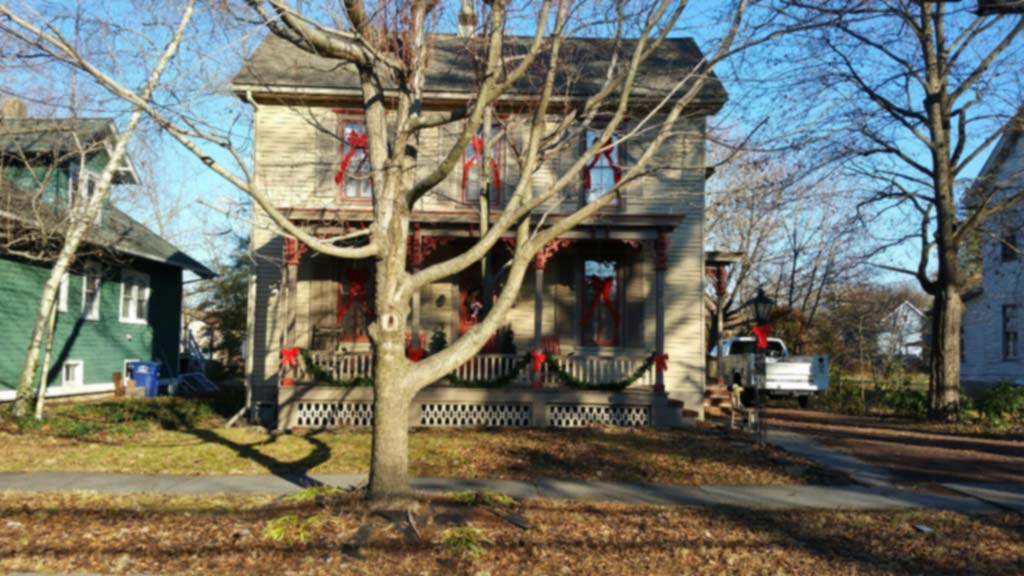 Lovely Medford Home in Burlington County's Pine Floors old and new repaired, boards replaced
 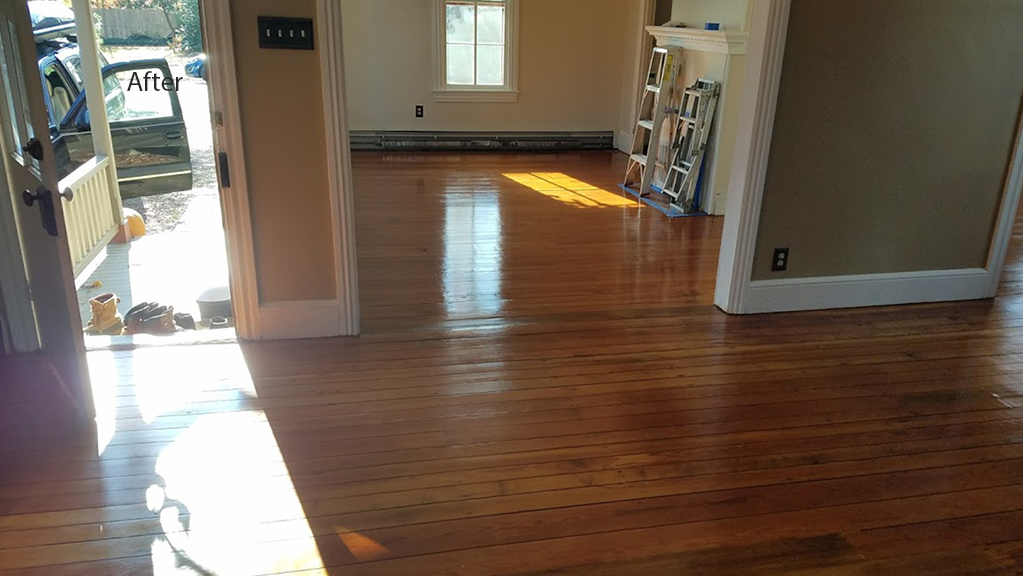 Picture of the pine floors in the dining room and living room after splintered boards replaced

The Problem
Old vintage pine boards, a soft wood, tend to get beat up and can splinter or develop shards that break off. When this happens it becomes a huge problem because the splinters and raw edges become not only unsightly, but are potentially harmful for walking bare foot, crawling on, or even for pet paw traffic. Isolated repairs stick out like a sore thumb, so unfortunately what can be a small problem expands in to a much larger one, as in this case.
For our project several pine boards had dangerous edges and, large gaps from shrinkage were also a nuisance.
A Reality Check for the Client
As a client evaluates their board dilemma, it must be determined what they want from the project. If absolute “cookie cutter” perfection is in order, this kind of repair and refinishing project is probably not a good fit. Usually clients have a vintage look they are used to, and want to restore the vintage appearance as part of the refinishing process. Typically they are okay with the fact that the wood will retain “character.” And typically it compliments the dwelling or structure so folks will usually accept that the wood will have a unique and natural appearance.
With this in mind, and a degree of acceptance of character, this type of refinishing will have a favorable outcome.
These homeowners have a historic home in Medford. As conveyed in the full project case study, this young couple was motivated to repair the boards and refinish the old and new wood before their infant begins to crawl. You can see the overall project here. There was no question they wanted to preserve the integrity and historic feel the home commands. And since the neighbors just had us do their vintage floors, it was the gentle urge they needed. Check out how the neighbor’s project went: freshly refinished Sears & Roebuck Home.
The Challenge
Determining the Species & Locating Replacement Stock
Anytime there is a vintage wood floor project you have to assess the situation. Are the boards in good shape or are there boards in need of replacing? If you have to replace boards, is there any “attic stock?” Attic stock is an industry term for does the homeowner have a stash anywhere, and preferably in the attic or in a dry space. If so, half the battle is done. If not, you have to determine the species and hunt it down from reclaimed sources (where they command a pretty penny.) Just going to Home Depot or Lowes doesn’t cut it.
On this project we did not have attic stock. We did determine the wood was Heart Pine, and now the hunt was on. We had a mill lined up near Harrisburg (high priced as expected,) but we discovered a supplier had a stash that would fit the bill for a faster outcome. And thankfully so, this would have delayed the project- not a good thing for the family with small children and a beloved lab who moved out while the work was being done. The clock was ticking!
Organizing The Repair
Once all the furniture is out we were able to evaluate the “field.” We wanted to see where we could snitch existing boards from an outlying area so they would match perfectly. If so, the replacement boards would be harvested from an outlying area, and the reclaimed boards would be used where they were less noticeable. But no such luck.
For this project we could not “cheat” the repair, but instead had to install the boards in the middle of the field and bring on other techniques to “age the wood” so it would blend in. Again given it is pine, it is no easy task because pine does not accept stain evenly.
Define How the Boards Are Installed
Are they “top nailed,” where you see the nail holes, or are they installed “tongue & groove style” where you don’t see the nail holes. Are they accessible from the floor below, as in an unfinished basement, where you can see the underside from the basement.
Here we had a combination to deal with, both “tongue & groove,” “top nailed,” and “spike nailed”- an install technique using spikes instead of nails, which become part of the vintage or retro look. Lucky for us also, they were easily accessible from beneath.
But, a secret new technique barely on the market was the good fit. Suffice it to say we will just leave it at that. We aged the boards to a nice degree.
The Board Replacement Begins
We quickly removed the boards and fashioned the replacement boards according to their random widths, having to cut the widths by hand, board by board. This is different than standard width boards, where you just pop the bad ones out, and insert the replacements. This is more tedious to custom cut each board width to fit.
Next we replaced the transition board from the dining room to the living room. We inserted a wider plank to eliminate the gap the homeowners were living with. With all the boards set, next we proceeded on the to aging stage.
“Aging” The Boards to Match the Existing Pine
Until quite recently there were a couple of aging techniques that yielded some hopeful results. However, given that pine stains blotchy there would be no guarantee for the outcome. We also needed to “age it” above the raw wood level, so it would absorb more evenly. So coatings were applied and eventually we got the desired effect.
We asked the homeowners for their approval, and they said it was about right. However, more work was needed.
But Wood Holds Some Secrets And You Gotta Be Able To Dance
Of course raw wood being a natural element has behaviors and can react unsuspectingly. So was the case here. With normal procedures being followed we discovered some contamination that had to be dealt with. And, we also had a drying issue. Seeing how things came out, we had no choice but to re-sand and dry it with alcohol. Thankfully the homeowner was patient, and understood this was a custom job that needed extra attention and time. They realized the extra day needed would give us a better result in the long run.
A repeat of the aging process began with much better results. And with the homeowner’s approval we were given the go ahead to start the sealing & coating process. Again, using our water based “whey based” finish called Poly Whey we applied the finish. We lost the replaced boards in the field pretty well, which in lay terms means they blended in well and were hard to identify.
The Board Replacement Was a Success… No More Splinters or Gaps!
The outcome was a success, we fixed the splinters and the gaps. We got the vintage character the homeowners wanted. The floor was much safer now that the damaged boards were replaced, and the wide gap in the transition area was corrected.
It was our pleasure to restore this stately home and make the floors proud once again!