
Client Can’t Erase The Ugly Stairs In Her Entry Fast Enough
- Home Case Studies Client Can’t Erase The Ugly Stairs In Her Entry Fast Enough
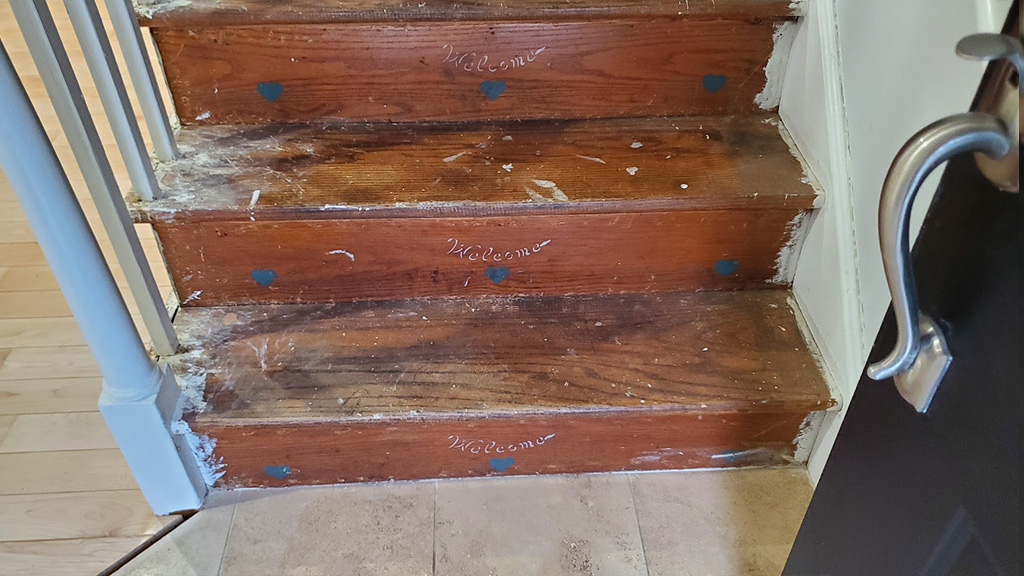 Minus the white paint, the blue hearts and welcome stencils on these pine stairs have to go
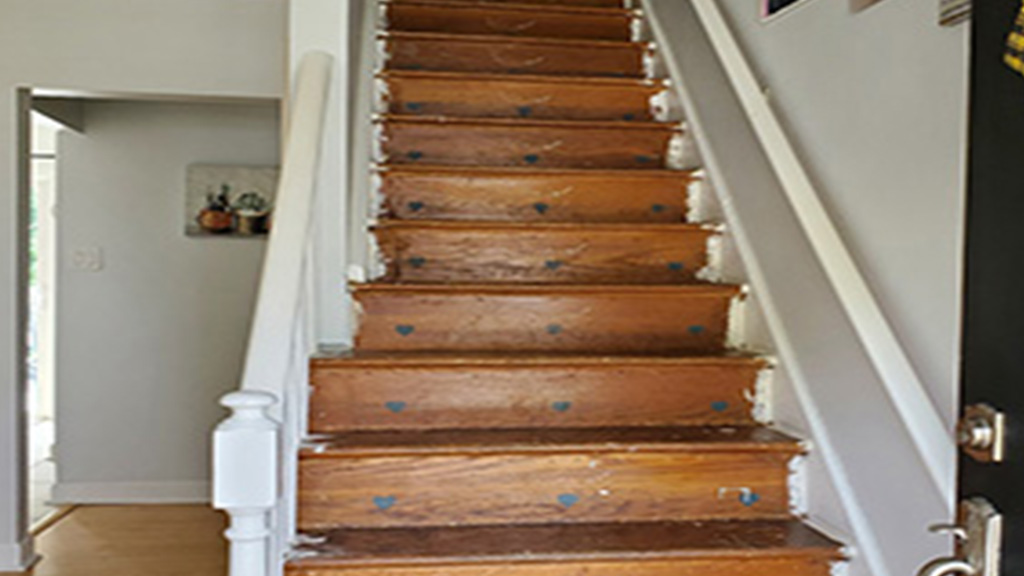 In case you need to see the whole set, not a way I would dress up old stairs, for sure
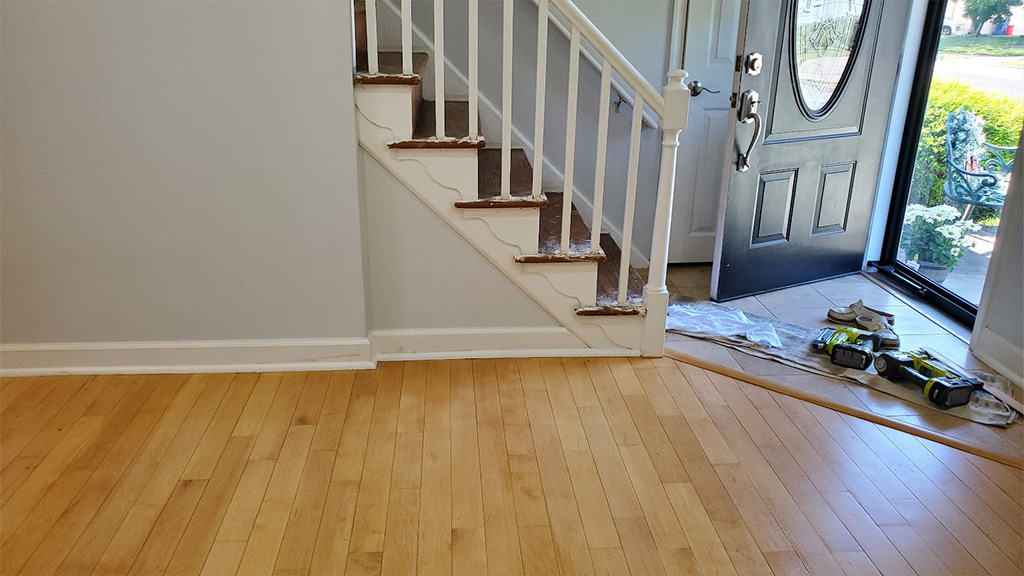 Removed the scratches and refinished the maple, this floor is clean and crisp
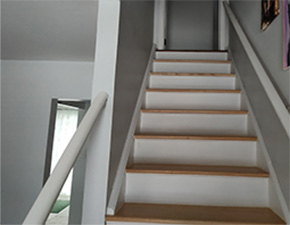
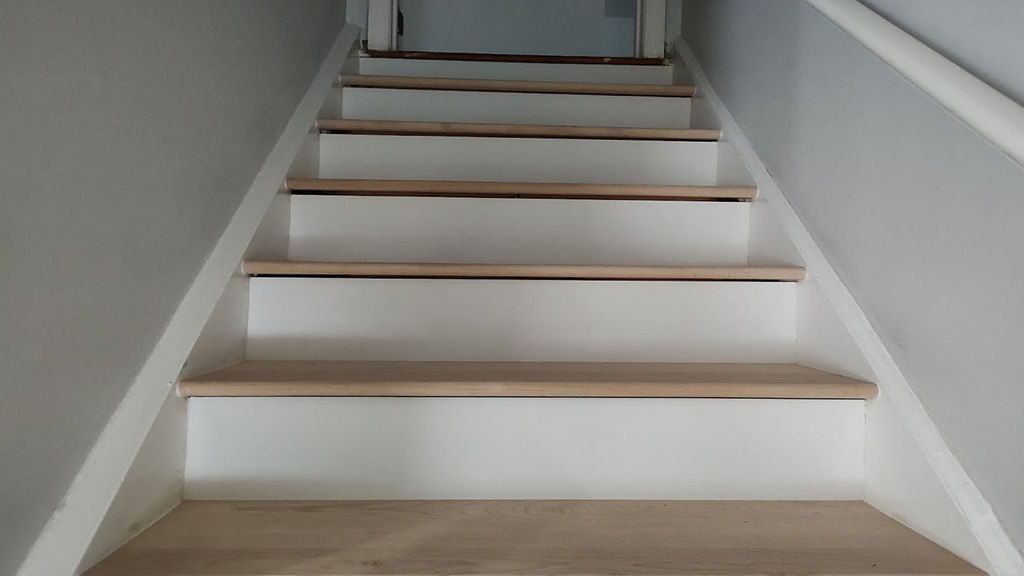 Immediately you see partially installed stair covers drastically improve the look of the foyer
- Location: Somerdale, NJ
-
Job:
Transformational stair & railing refinishing to remove old, ugly appearance
The Problem.
Our client, a homeowner in Somerdale, had dated stairs that severely diminished the tailored and carefully decorated look of her home upon entry. In fact, at the top of her list was to wipe out the ‘country bumpkin’ look. attempt that instead of being welcoming was actually embarrassing. Holding her breath, these stairs had to go!
The details and challenges.
Our Client Moves Fast to Put Her Touches on her new home. In the house not long, she worked both outside and in, adding her finishing touches. Moreover, outside she had some of the sidewalks replaced and trimming done. The home now had nice curb appeal.
‘Oh Mercy’-Just inside the door is where things ‘went south!’- Immediately inside the front door, the stairs hit you straight in the face. These stairs had a lot to be desired. And to her, the level of disproval was overwhelming. In fact, the appearance almost made her want to put her finger down her throat!
The stairs were old pine stairs, ‘on the cheap,’ put in by the builder where pennies probably were saved. But, that’s not the worst of it. Again, as described above, glancing at the stairs, and hitting you smack in the face were ‘lovely’ (not) stencils. In the center of the riser (up all 13 stairs), was a crested stencil with the word “welcome”. On each side left and right were two blue hearts. You couldn’t have made this stuff up!
A word from my husband’s Russian Lit class we use (forgive the spelling), for corny, laughable stuff, was perfectly suited here: ‘Paushlitz’. It refers to something being not welcome, laughable, out of good taste (You get the picture)! Use your own words. 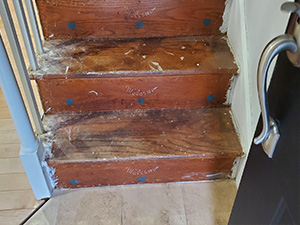
One couldn’t get away from them! And for the stylish gal that she is, the look of the stairs had to go! Patiently, she tolerated the stairs until we got to her to save her the angst! Finally all remnants were erased from her mind! On the contrary, she could now be totally proud of her home. It was now the reflection of the style she wanted!
The results.
With some clever upgrade tricks that didn’t require a full tear out, the stair treads were covered with “stair tread caps”. Also, we used a veneer to erase the lovely hillbilly country bumpkin stenciled look. Now there was a tasteful appearance that was now welcoming. (Don’t get us wrong, stencils were a thing, but slapped on these cheesy stairs it just screamed ‘country bumpkin!”)
In the end at this point there was relief. And promise was made, soon that the final piece would complete the look and vibe she is better known for!