

Dated Railing and Stairs Detracts From Very Stylish Decor
- Home Case Studies Dated Railing and Stairs Detracts From Very Stylish Decor
 Once we found pine treads we knew we had to cover them with oak treads to match the new oak railing
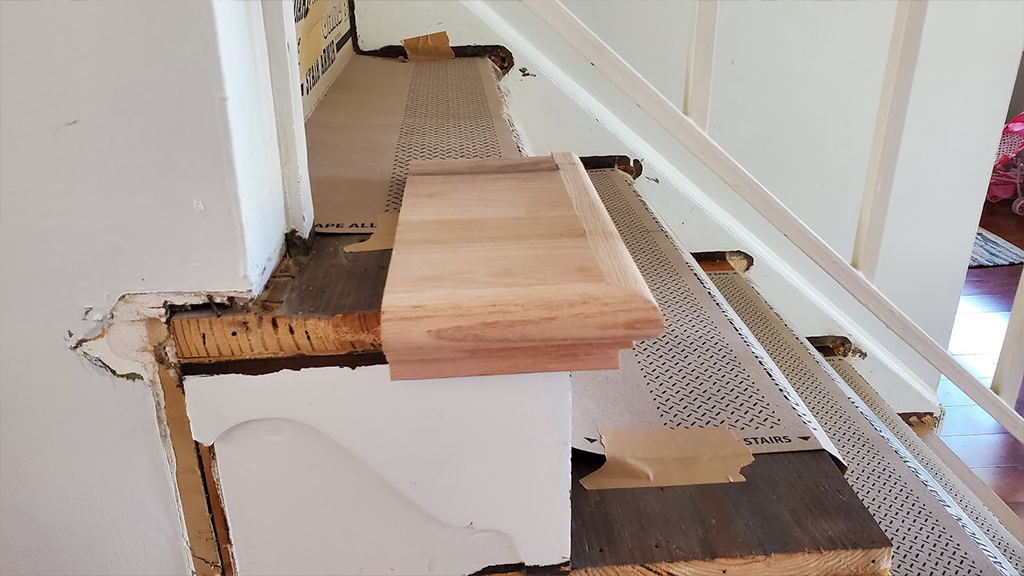 Here is an example of the new oak tread
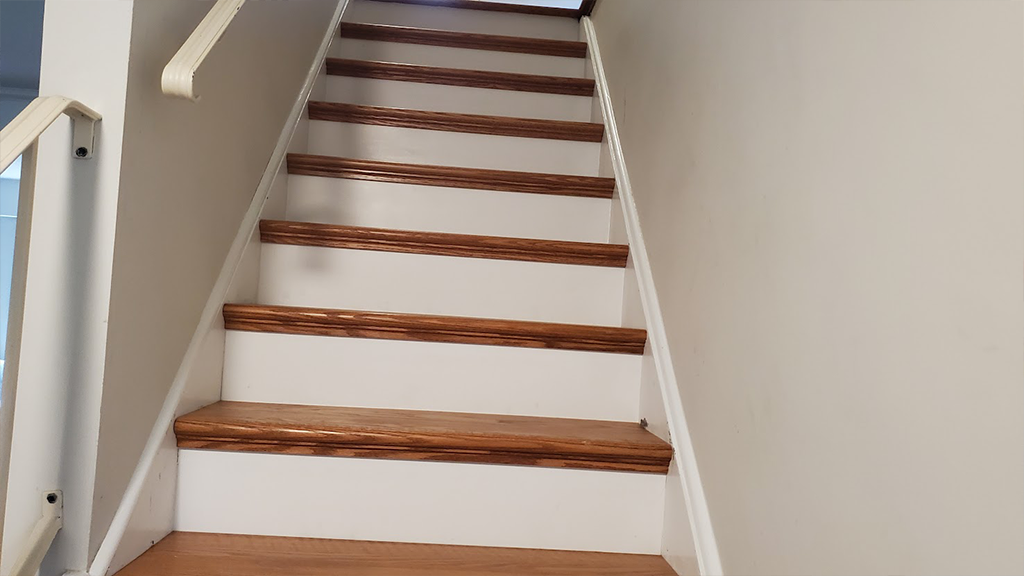 These tread and riser caps really dress up the stairway
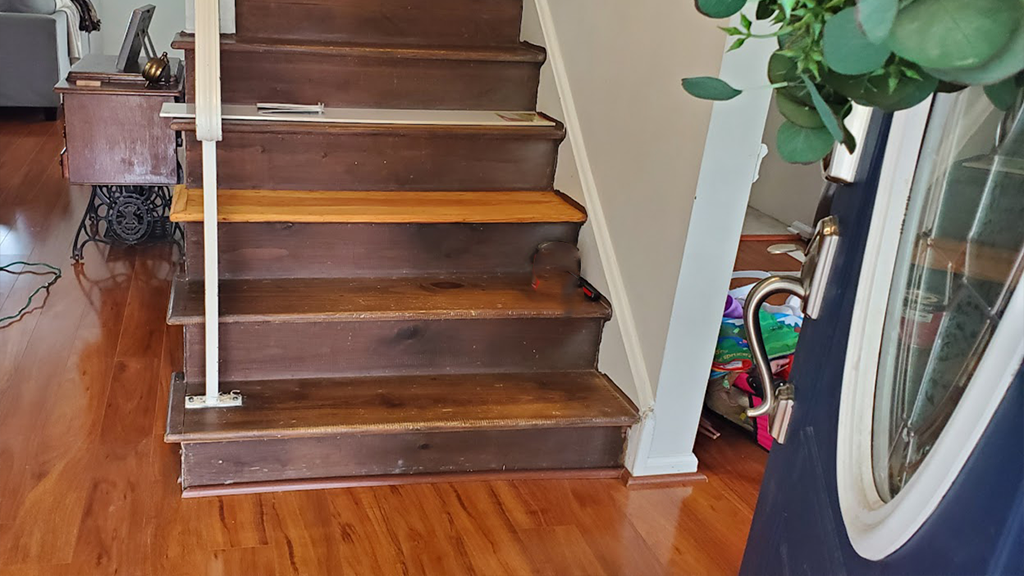
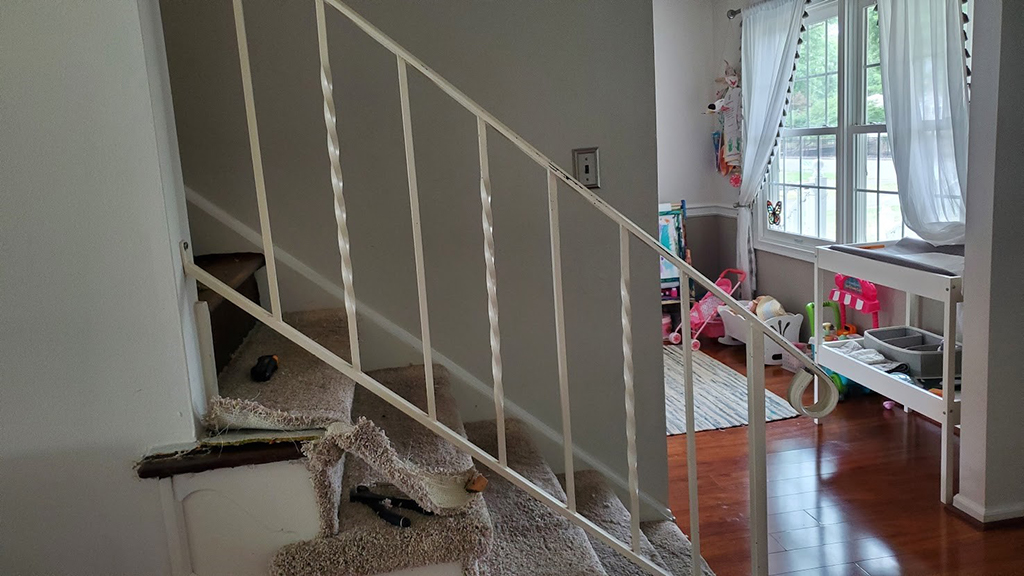 This is the railing and stairs before they are updated
 Here is the updated railing and stairs after it is finished
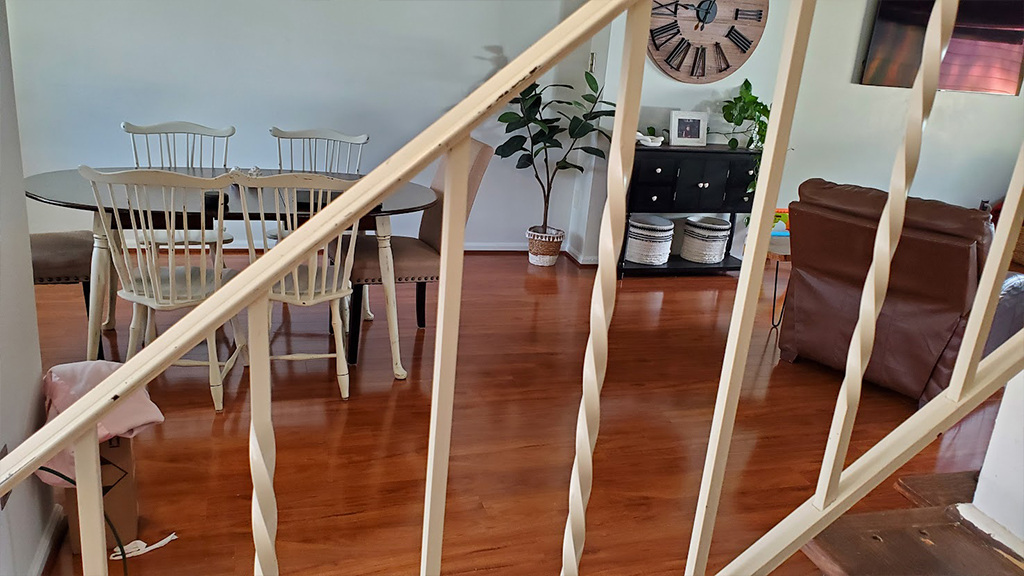 Another picture of the dated wrought iron railing
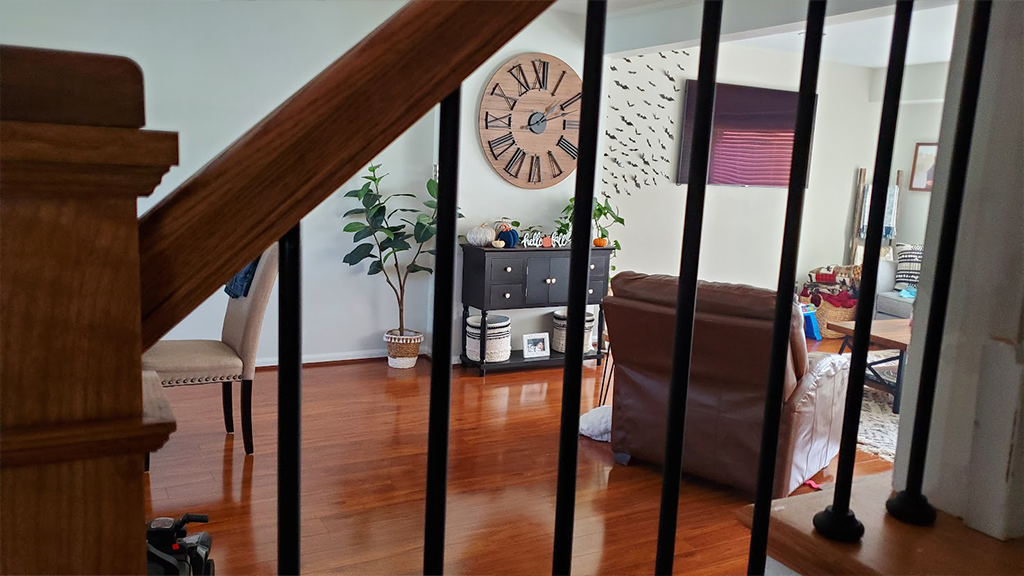 This update goes perfectly with the homeowner's decor
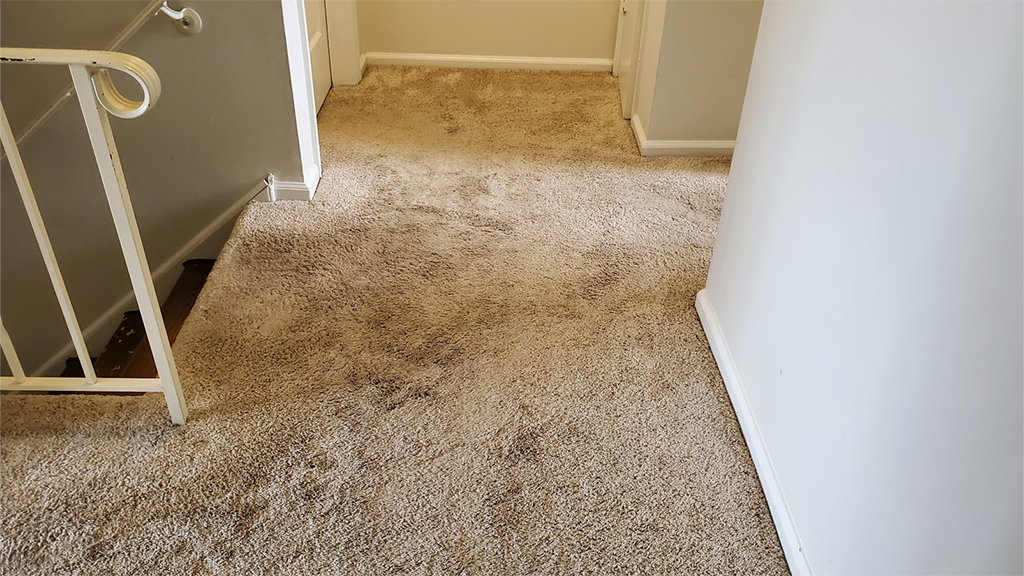 Here is the upstairs hall before the oak hardwood is installed
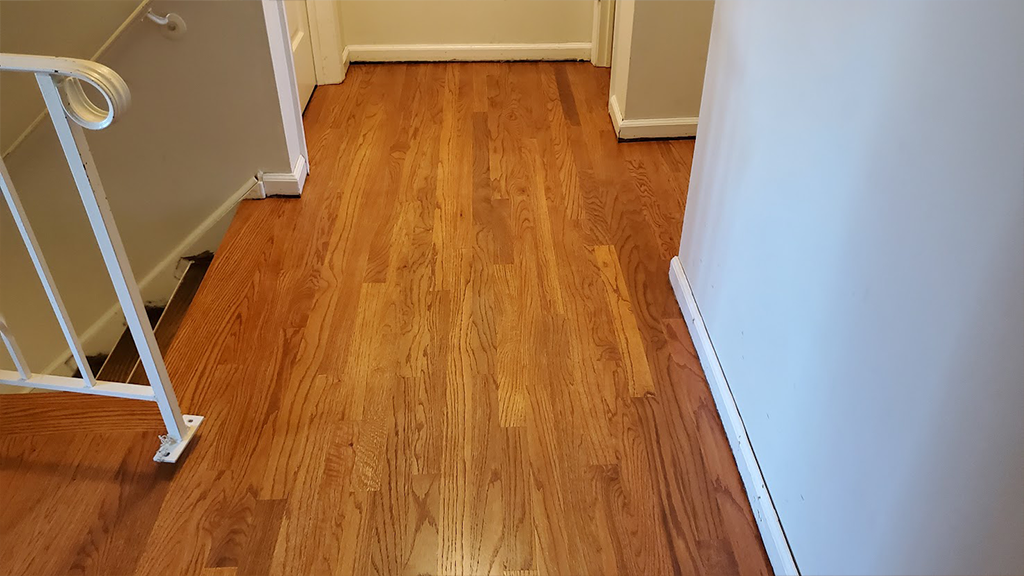 The hallway is updated with oak and finished to match the downstairs floor
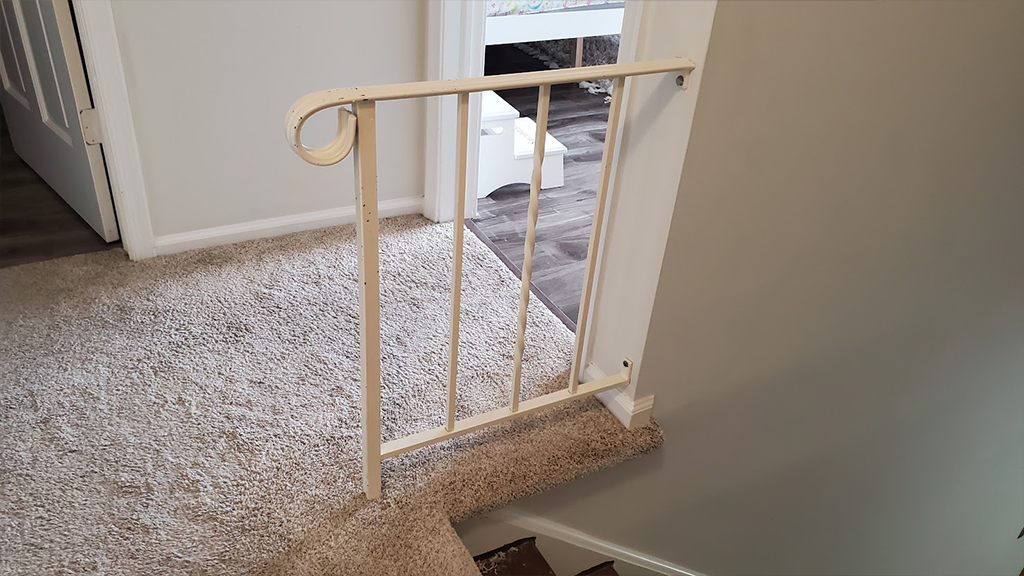 Again, this is before the new hardwood and oak railing is installed
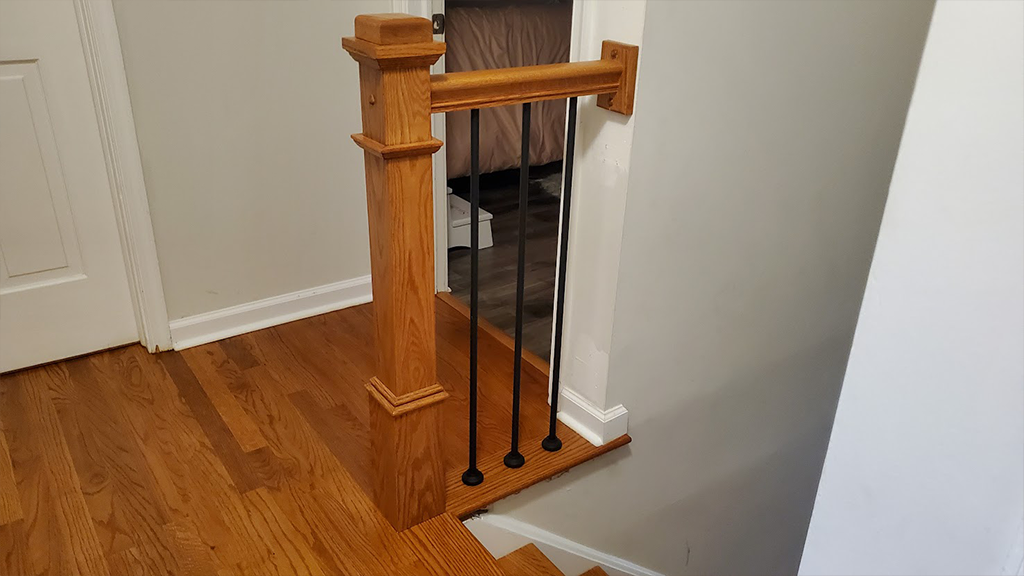 Here is the upstairs hall and railing finished
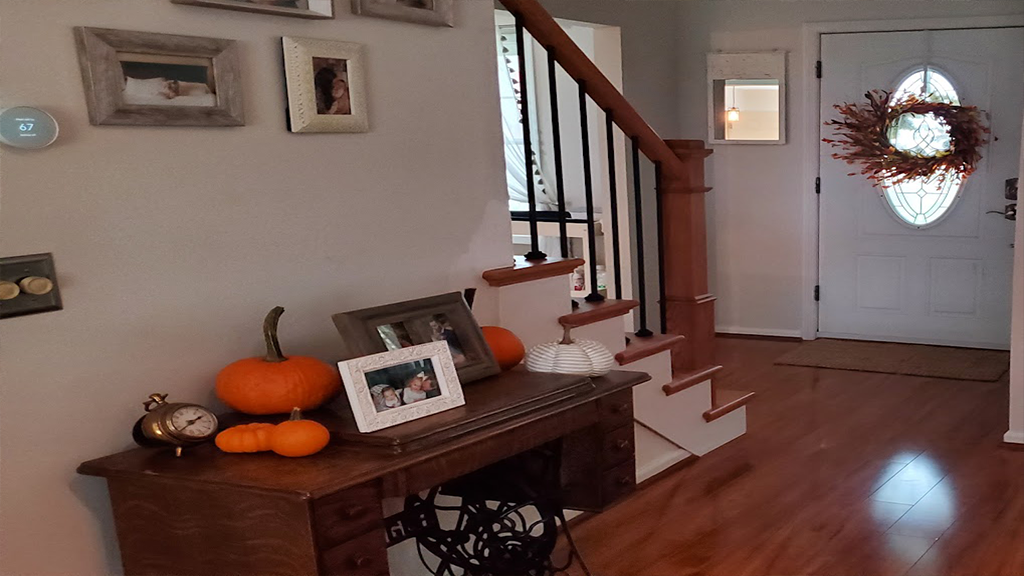 Here is the side view of the new oak hardwood stairs and railing
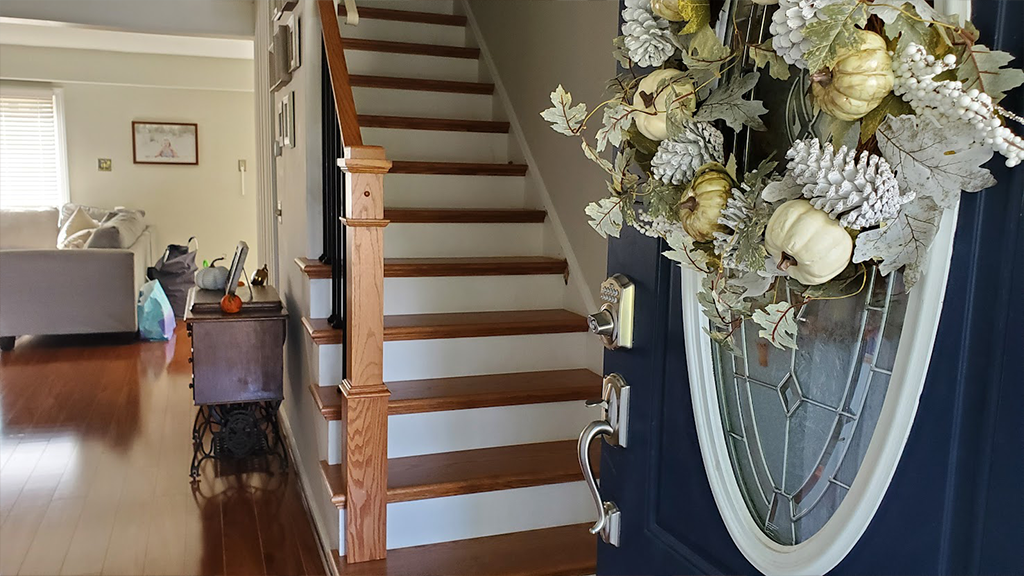 Newly refinished hardwood stairs and railing

- Location Residence in Shamong
She Can’t Stomach the Christmas Stockings Hung One More Year on Her Dated Railing and Stairs
What started to be a quick little update exploded into the right way to upgrade the stairs and railings. Our daughter in law has a keen eye for style, so when she found their first home it ticked off her must haves. For her great curb appeal, slick clean lines, and a minimum of projects to get it to her expectation. Make no mistake, she is really talented, repurposes things, and whenever she does something it is stunning. In fact, she often gets asked by those close to her to help them, which she does from time to time.
Well first up was the kitchen, it was reconfigured to include an island. The cabinets were painted and granite counters were added. So next up, was her dated entry. You walk in to this house with beautiful accoutrements only to be greeted with worn carpets, stairs, and railings that your grandmother loved way back when!
Where We Come into this “Mini Project,” (or so She Thought…)
When they bought she could deal with the ‘ok’ carpet, but the vintage 60’s-70’s railings, well, she was not a fan. So as things were getting done, she was ready to get rid of the short 3 1/2 railing right inside the entry and the carpeted stairs that detracted from her stylish first floor. In fact, she can’t stomach the look any longer. Well, so be it that there were other pressing projects, but you know the mantra, ‘Happy wife, happy life!”
The Problem
The stairs are carpeted, and the railing, well nothing more is needed to be said. Wondering if there was wood under the carpet, we took a peek. There was wood, but it was cheap pine. So when considering a new railing system there was an imbalance between the pine floor and risers, and what most likely would be used on the railing, red oak.
Un-phased, our daughter in law was ok for what the pine could look like. But the idea of an oak railing with a pine floor was not sitting well with us, or Uncle Brian. Uncle Brian, an adopted Uncle in his own right does things the right way. And while I was caving because of budget, Uncle Brian stood firm. Having been used to what he has told us over the years, ” You are going to do what I say should be done, and you are going to like it! Unfortunately, each contemplation involved an upgraded decision.
The Proper Solution With Bated Breath
We strongly suggested that we install red oak stair tread caps, and white veneer riser material to completely cover the pine. We further presented either an oak railing system with painted spindles, or metal spindles. Proposing both, she decided on the metal railings. And frankly given her decor in the foyer, living and dining area the metal spindles would definitely be a striking enhancement. So. metal spindles it is.
The Eyesore is Removed
First we tore out the carpet off the stairs. Next, instead of a new carpet in the hall upstairs and bound runner on the stairs, our daughter in law decided on forgoing the runner. Instead she opted for installing hardwood in her upstairs landing and leaving the hardwood as is with stained treads and painted risers. Cha-ching! The budget was growing. But, honestly knowing her style, this is what should happen. And instead of her husband’s wishes (our son,) we developed the right installation for what she (they) needed.
Doing the Installation of the Upstairs Hall Then Finishing in Place
The carpet is out, the upstairs landing is in. The stain color, gunstock, is mostly approved by our client (“DIL”- aka Daughter In Law) It’s tricky, but we matched the first floor LVP laminate floor. So we laid the stain down, and offered to apply a slight bit of tint in the finish coats to deepen the color, which worked out perfectly.
Homestretch— the Stair Parts are Installed and Railing Parts Are Pre-Stained
Next the stringers got cleaned up, and the riser caps were fit in to cover the pine risers. And once in place they were painted. Then the stair nosings were cut off, to make way for a proper fit. Once cut off they were ready for the caps to be installed.
Meanwhile offsite we stained the treads so they would be installed already finished.
Enter Uncle Brian, carpenter extraordinaire to work his magic. He installed the stair cap treads nice and snug to cover the existing pine treads. While the top steps are no problem, the last 5 stairs are open and boxed stairs, and require some extra “tweaking.” With that task done we could begin to touch up the stringers with trim paint.
Meanwhile, offsite Uncle Brian assembled the newel post sleeves, and gave us all the pieces to stain, which we did again off site.
Finally The Reveal-The Stairs, Railings and Newel Posts Are Done
With not a minute to spare Uncle Brian installed the railings, and finally the spindles. The project is 99% done, with exception to the 2′ failing at the top of the stairs (that can wait as it is not birthday party critical!) Jacquie could be at ease, she could have Beau’s First Birthday Party, otherwise known as “Octbeau-ber Fest” with not only all eyes on her special baby boy’s birthday, but all eyes on her front stair case too! (No more embarrassing front entry!) And done well in time for her Christmas Stocking picture perfect “Kodak Moment!”
Call us if you have a stair and railing conversion, we can help. Transform you stairs and railings beautifully, be it simple or complex we have the team that can do it all! To get a free estimate Call us at 609.953.0472 or CONTACT US.