

Weird Hump In Hardwood Looks Like a Speed Bump
- Home Case Studies Weird Hump In Hardwood Looks Like a Speed Bump
 Lack of proper nailing caused the wood to react swell and pull off the joists causing damage above
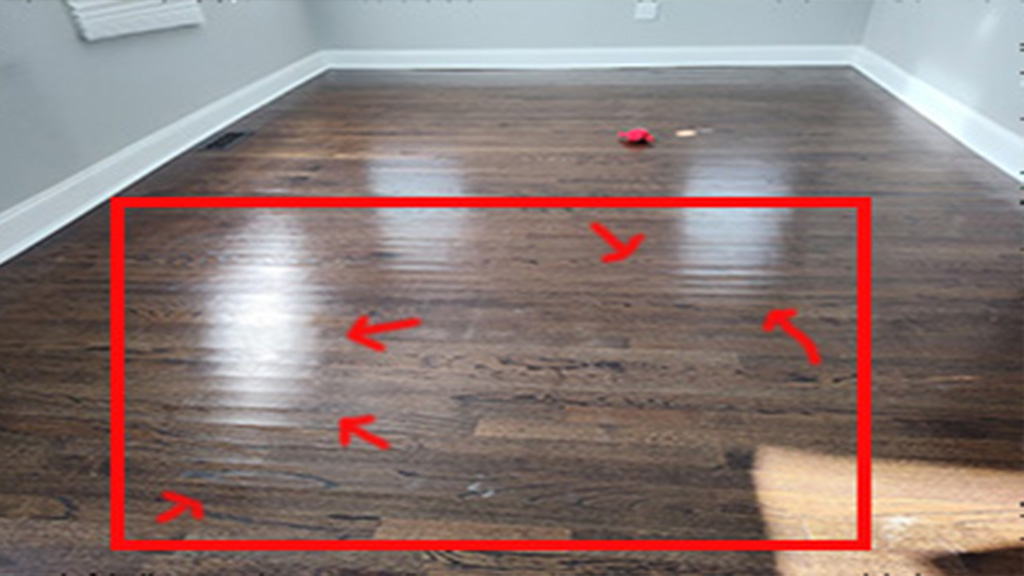 Cuping is a symptom, and in this case trapped crawlspace moisture
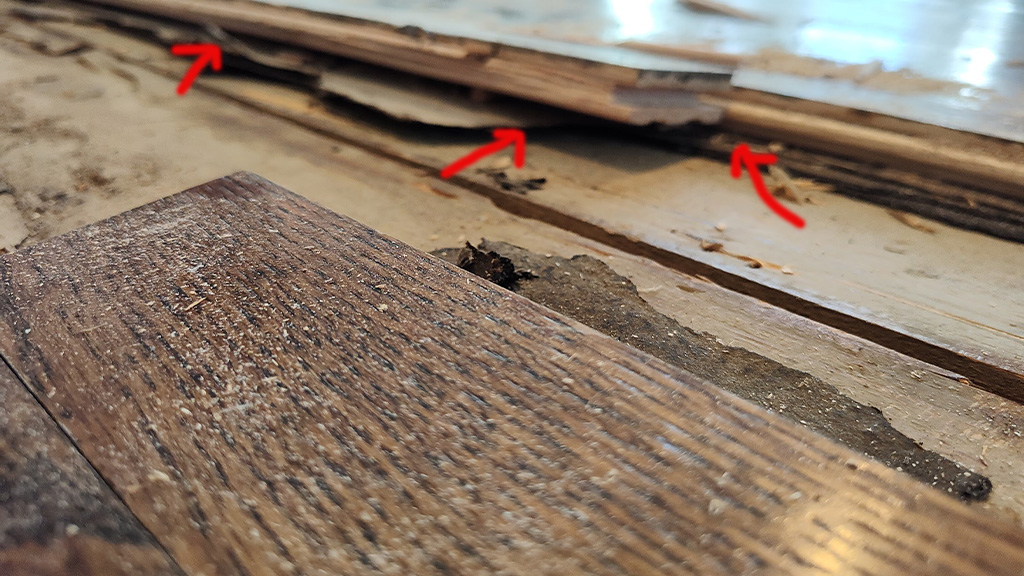 As the subfloor swelled it forced the fac boards to rise at an angle causing a bump or hump in the floor
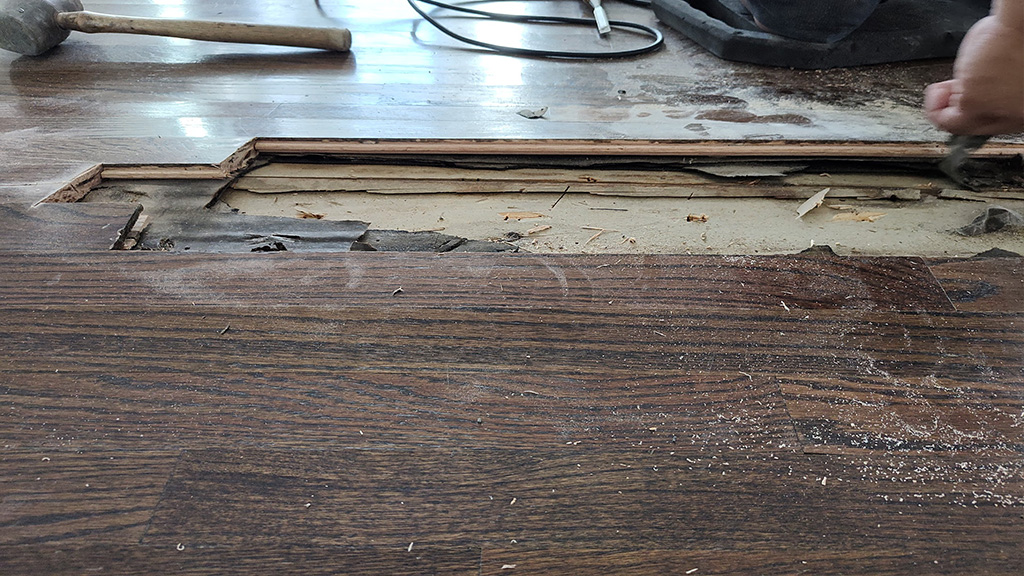 All the water damaged affected face boards are torn out
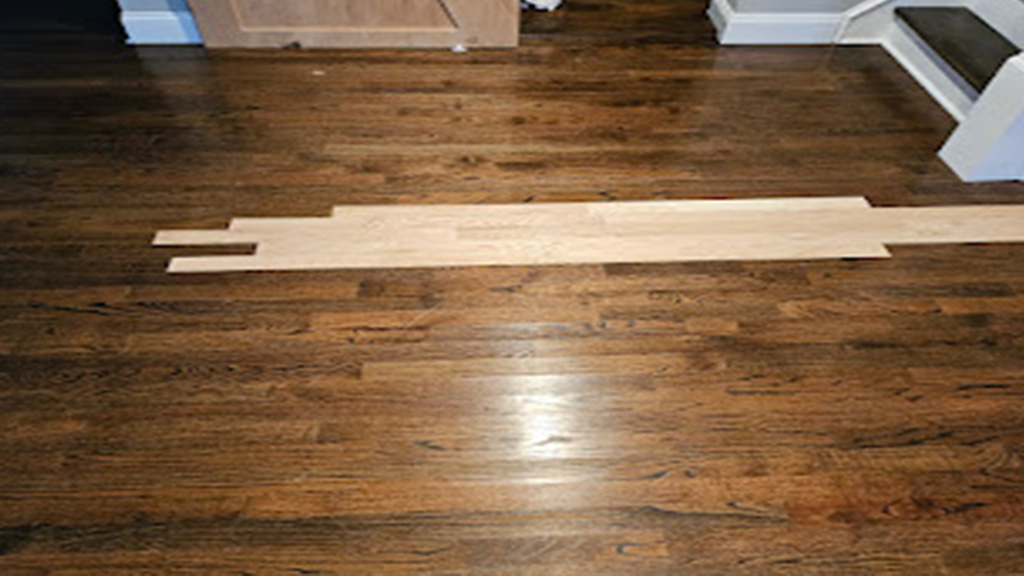 At least now the hump trip hazard is gone on the floor, now the clients can plan on what do do next
- Location: Maple Shade
-
Job:
Strange jump in hardwood floor restored
Got a call from a customer with a bizarre bump in the middle of their hardwood floor in their entry-dining area.
Having lived with it like that for a few years now they had moved and wanted to fix it before renting it out.
Although annoying, they learned to live with it. But it couldn’t be rented out that way. It was was a major trip hazard.
First and foremost she revealed that Mr Handyman of Cherry Hill referred us to her. A premiere and award winning handyman service, we are their ‘go-to’ referral partner for hardwood and all specialized floor care and restoration. For more about them, Click here if you need handyman work or to learn more about Mr Handyman. So they quickly referred us and the client was told to call us.
In conversation she expressed that her hardwood floor had a major trip hazard which had to be fixed ASAP. They wanted to get it on the market for rental. Not rentable as is, it would fail “code,” and instead be a law suit waiting to happen.
The inspection.
I told her I would come right out. And when I saw it, I agreed she was right! Perhaps it was another wonder courtesy of Mother Nature!
We enter the house, an open concept first floor, and she took me right to the ‘wonkiness’. Frankly I was stunned. I had never seen anything like it. Right at the base of the stairs, parallel, and running with the face boards, there is this substantial “hump”. Not quite 18″ across, but about 2 1/2-3″ rounded high, and about 72″ long, it was an impressive flaw in the floor. Again, about the best way to describe it, it looked like a speed bump.
Asking about it, she told me it was that way for 4 years, and said it appeared a couple months after they moved in. In hindsight, I should of asked what time of year it occurred. I bet it was probably summer, but didn’t ask. She did add they had been living with it like that ever since.
Knowing it was urgent I said I would get to the bottom of it and have a solution. But before I left I did ask if there was a basement. She replied no, there was only a crawl space. I then asked is there access to the crawl space. She said yes, but it’s tiny. We couldn’t get it open. So we left it at that. She showed me where she hid the key, and I left.
The next day I took Marvin to see the “hump”. Mavin’s quickly responded “what the heck!?”
He agreed it was way wonky. First we needed to identify the direction of the floor joists. But at first glimpse we weren’t sure. Usually the boards run the opposite of the floor joists. That way the joists support the floor boards.
Marvin then set about checking the stability of the ‘hump’. He jumped on it to see if it was soft and mushy, or hard and unwavering. The latter was the case, it didn’t budge when he jumped on it. Next he got the hatch opened to see the joists ran opposite the floor boards.
But to solve the puzzle we needed to inspect the crawl space for moisture, and see the subfloor below the hump. So we agreed to reconvene with Chris and some tools and a hygrometer (which measures humidity). We left and came back prepared and with Chris.
Determining the cause.
We came back with a step stool, a penetrating hygrometer, a flash light, and a cell phone to check from beneath the wood floor. And as expected, Chris was able to diagnose the cause once down in the crawlspace!
He assessed several things that turned out could be reasons or contributing reasons that caused the “hump.” For instance he looked:
- first to identify the type of subfloor, concrete or dirt. In this case it was dirt
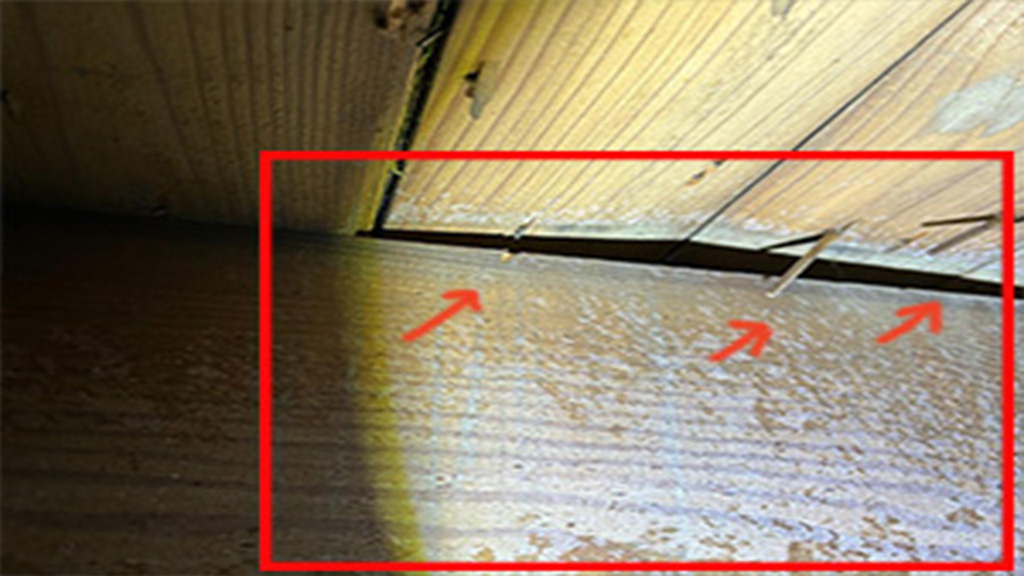
- for a presence of moisture, i.e. standing water, dried water puddles, dry or wet mud indicating the current or past precense of moisture In this case it was dry and not evident of a past major moisture problem with the subfloor dirt
- and measured the humidity of the trapped air space at the time of inspection. Although not sure the air humidity, probing the subfloor woods and joists (by sticking a hygrometer probe in the wood) he observed it was between 10-15% (high for November, and he determined it was probably far higher in the summer months)
- for what visual issues explained the swelling and damages were the cause
Overall Chris summed up his inspection findings.
At first glance the dirt floor seemed dry, with no evidence of mud. He ruled out a plumbing problem, there were no pipes there. Up top I jumped and he located the direct spot. He saw two subfloors, one a tongue n groove subfloor, the other OSB (particle board). Looking closer, he saw the OSB started where the old wall ended.
The older tongue and groove was the culprit! Unsecured, the tongue n groove subfloor had swelled up above the floor joists, over an inch. Seeing 2 nail misses, sloppy contracting was the cause. The unsecured section swelled up, creating the hump above it.
Expanding his inspection he sought more clues as to why the hump happened.
Looking for more clues, he saw the foundation wall only having 1 vent, so there was no cross ventilation or ability for moisture to exit the crawlspace.Good news for the homeowners, the floor could be corrected without major structural repairs or expensive waterproofing.
Additionally pictures and a video verified there had been water, and rusting of the nails and water and mold decay on the nearby joists. of the very obvious evidence of not only drips but former puddles that are right where the swelling was located.
The fix.
From the inspection we now knew that we could open up the floor from above and begin the repair. Before we started we were hopeful we would be able to stabilize the existing subfloor back on the joist and level the floor. (The more involved fix might have been to cut the subfloor out, replace it, shave the joists, sister the joists and more, at additional time and expense.) So this was the best case scenario for repair, and for the homeowners for sure!
Marvin jumped back on the very next day and got started!
Right away Marvin opened up the floor by removing the face boards. It revealed the subfloor swelling damage just underneath. You could actually see the starting place of the swelling. From the edge the face boards tilted up on angle. substantially. So he extracted those boards far enough across the hump.
Although there was play in the subfloor there was hope it could be secured back in place.
Evaluating the subfloor, it was solid and didn’t need to be cut out. So with some massaging, and a screw gun he got the subfloor tacked down on the joists. He screwed several nails through to the joists so the subfloor would never do this again (in this area, at least!)
The results.
All flat and sound he was ready to replace just the boards directly where the hump was located. No major surgery necessary, he completed the repair quickly. And left as is we stained to near the original color, and spot applied finish. (They opted for a partial repair as opposed to
Our client’s dad, on hand to observe while doing chores, he was thrilled at the repair and forwarded pictures and a description of the repair process to his son.
We further left instructions that they need to install more foundation vents, and install an on-demand power vent fan in at least one of them. This would resolve the problem for good. Compared to what it could have required it is wise money spent!
If you have weird, peculiar or wonky things going on with your hardwoods give us a call for a free evaluation and free estimate. Call 609.953.0472. Or Contact Us on line and we’ll reach out!