

Fixing Blemishes Before Refinishing Hardwood Floors
- Home Case Studies Fixing Blemishes Before Refinishing Hardwood Floors
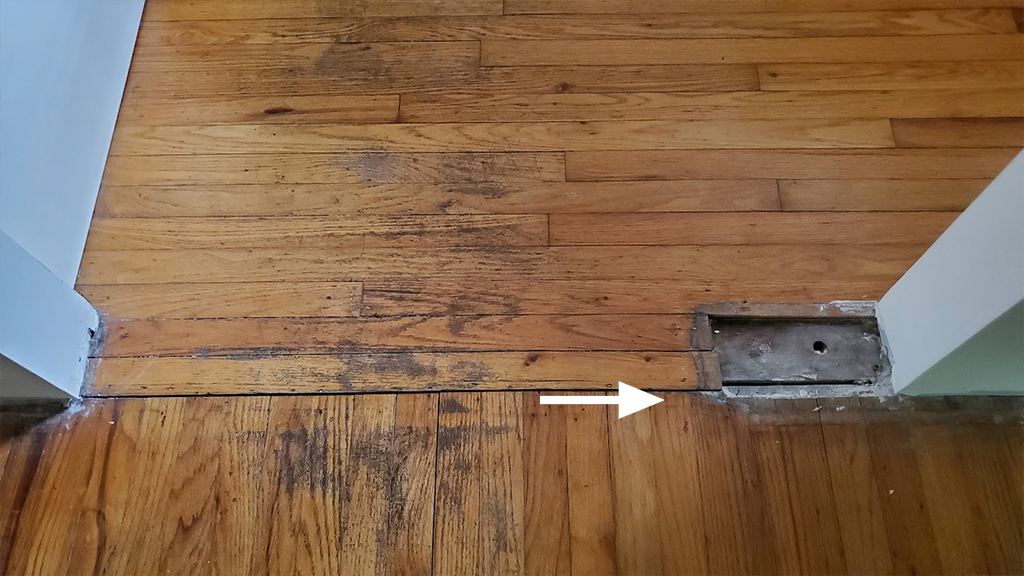 Before we refinished these hardwood floors we need to weave in some boards
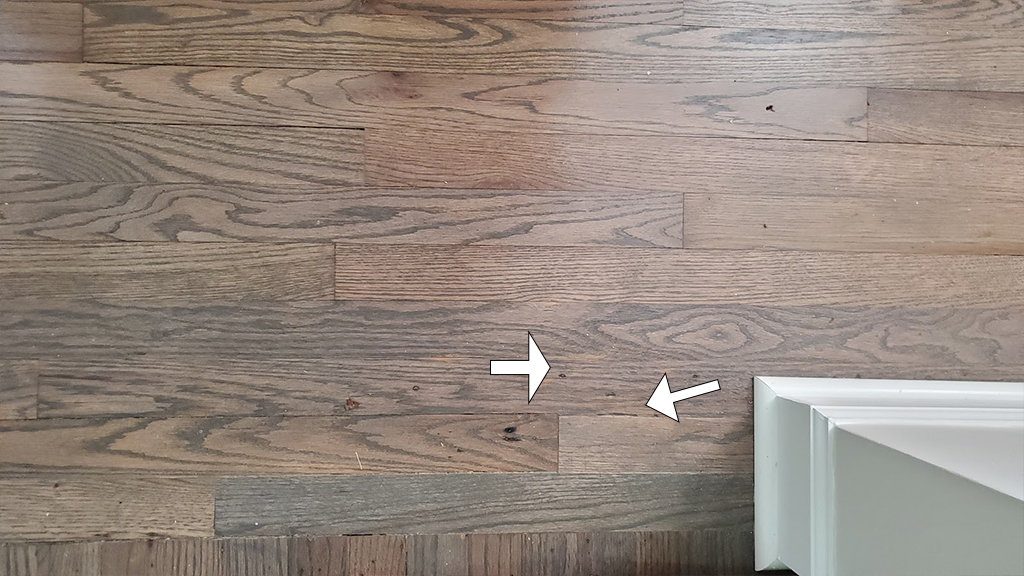 Here is the same area after it is done, you would never know
 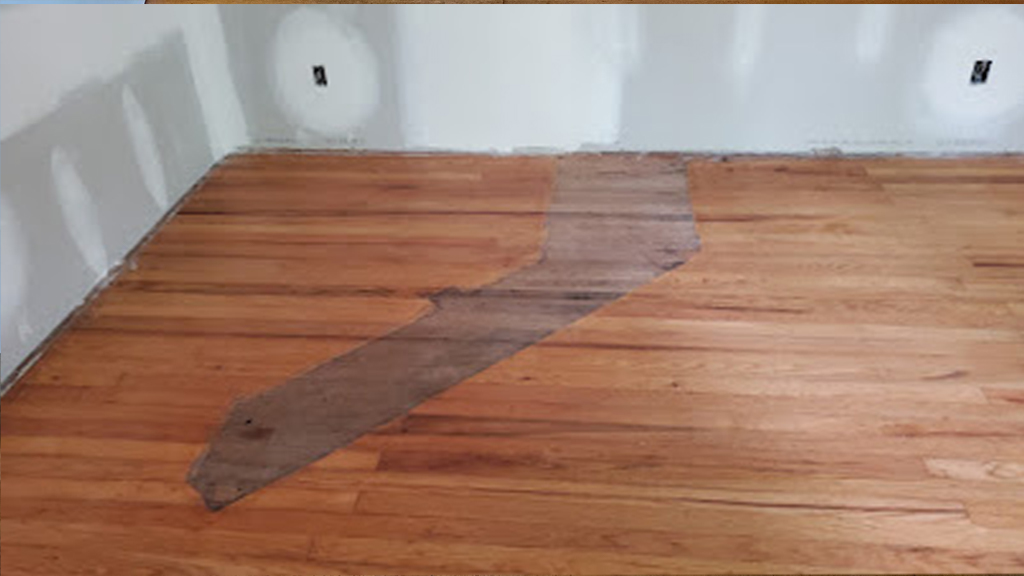 After a bar was removed the stain from the wood stained the floor
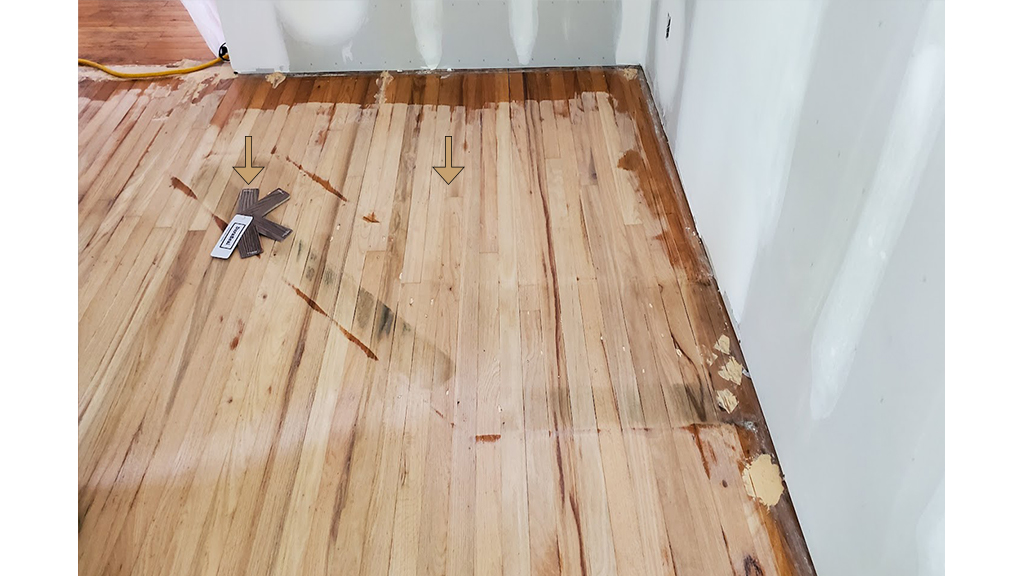 With just sanding most of the dark stain is removed, hopefully bleaching will remove the rest
 By sanding, bleaching and using a slightly darker stain, the red oak bar stain is completely fixed
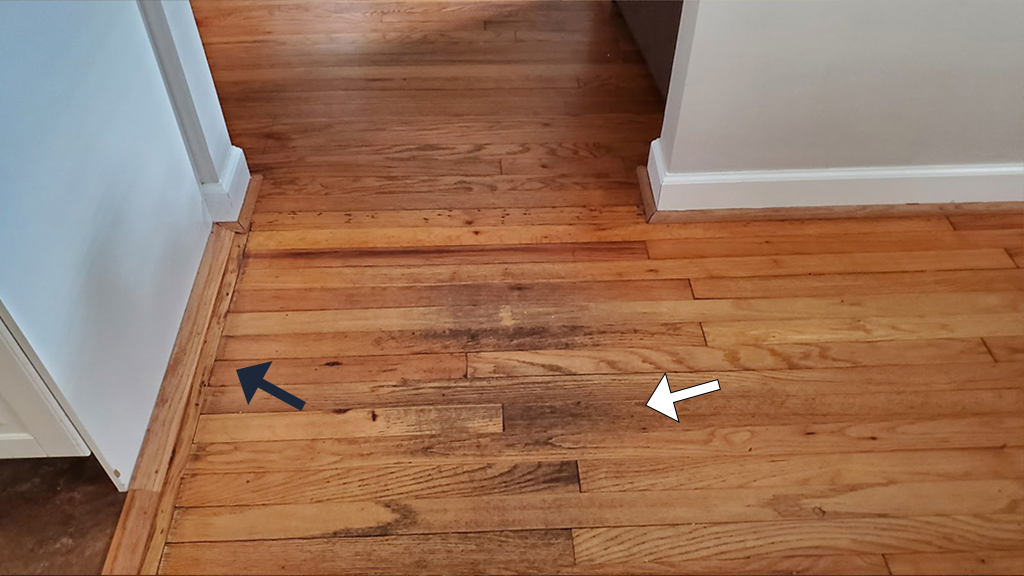 Here we promised to clean up the traffic wear, and cover up the box cutter knife slice
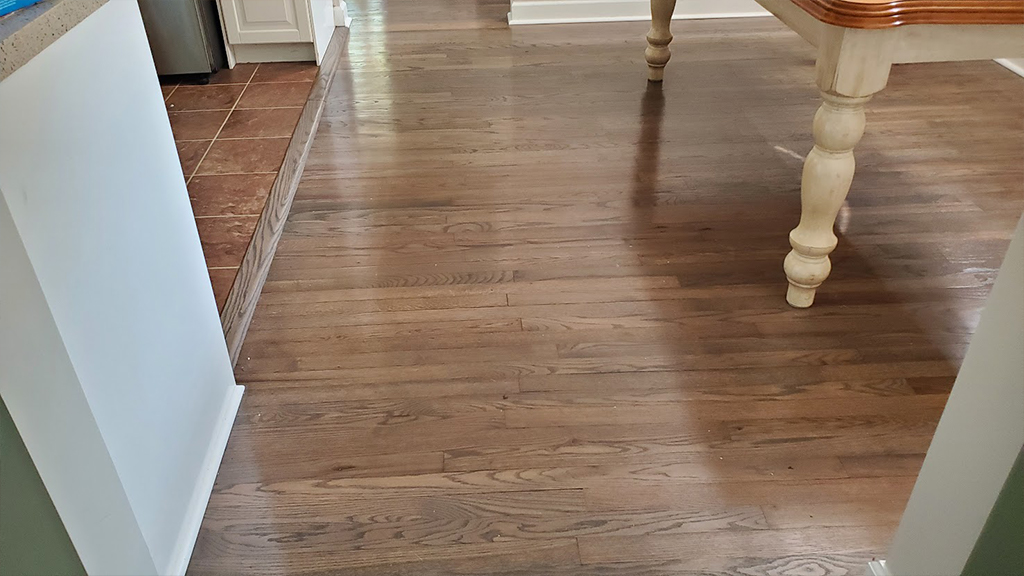 Look at the difference, no more traffic wear, no more slice, just beautiful floors
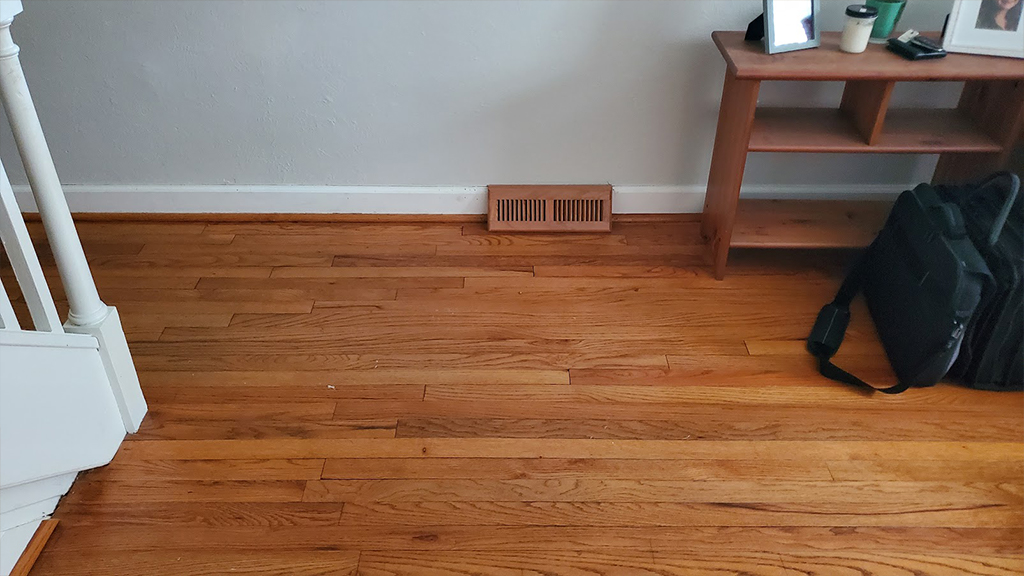
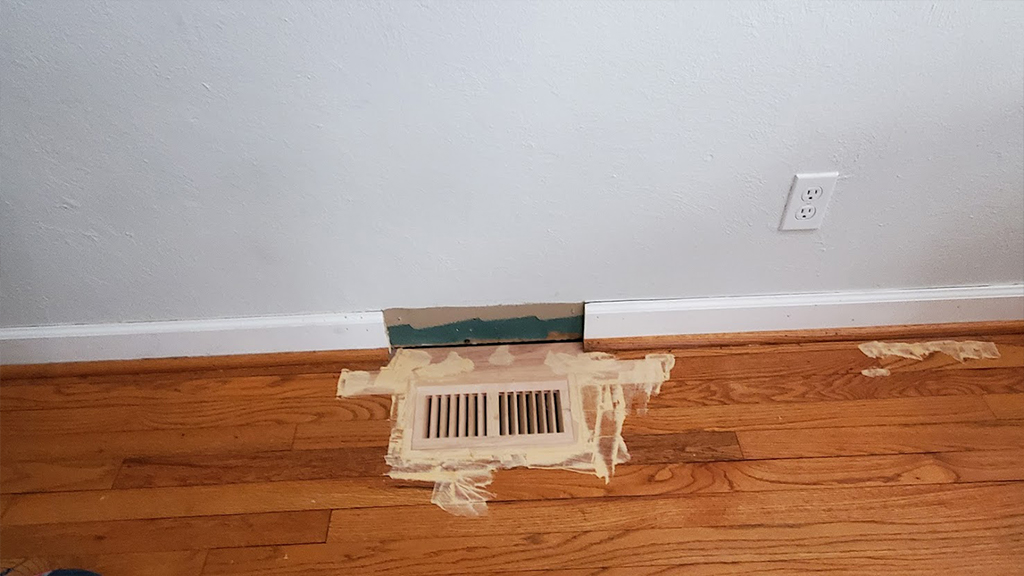 This vent is now flush in the floor, so you barely see it
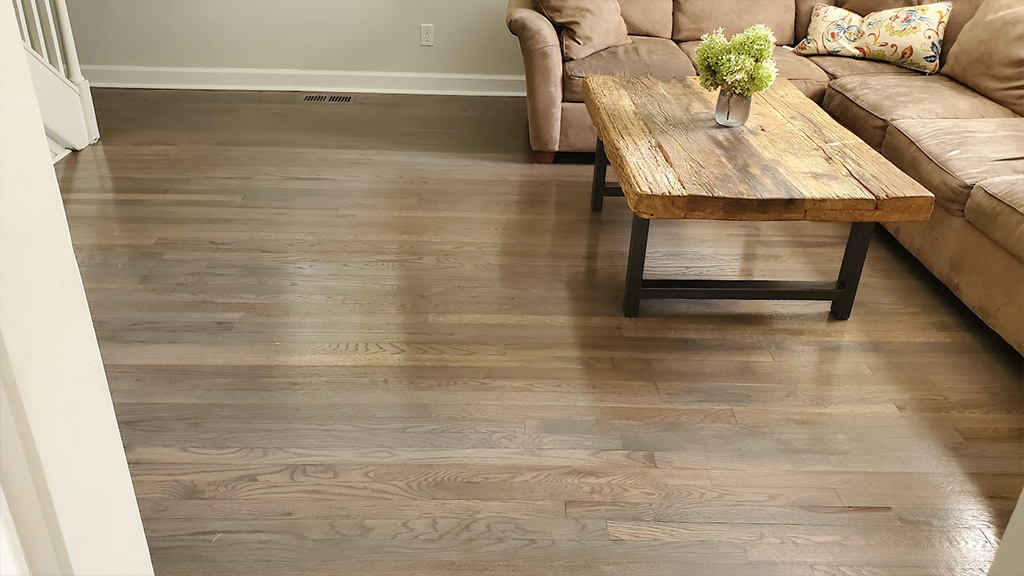 This is a stunning conversion of the Medford red oak floor
Our clients got their wish list to have everything repaired and upgrades installed before their refinishing.
By the end of our first walk thru to inspect their floors, our ‘client neighbors’ quickly got the feeling we poured our heart and soul into our hardwood floor refinishing. They had several things that annoyed them, and as we pointed out solutions for all of them, they knew we were the team for them.
On their punch list was:
- to plug some holes, and weave in boards where a wall was moved and fill in where some ducts were abandoned.
- repair a stained area in the family room where a bar was once located, and not going back.
- weave boards in to make a void left by moving a wall to the kitchen disappear
- improve the transition area to the kitchen where there was a visible slice from a box cutter they inherited with the house, as someone sliced into the wood when they cut up carpet (which won’t come out with sanding.)
- install flush vents
- installed another transition going into a newly created storage closet with a pocket door under the stairs (no picture)
- and the main objective- get that very important stain color that’s not too little of this, or too little of that– not trendy, but a perfect balance that lends to different highlights to compliment their new paint and décor theme (no picture)
So after we shook hands our team got started.
Along with other contracting including HVAC work, we noticed that 2 HVAC vents in the family room were abandoned, and 2 other ones were installed in a less vulnerable location in front of the sliding glass door. Additionally we suggested they take a look at the recessed vents we offer clients, as it’s definitely an upgrade, and certainly looks better. But beyond the enhanced appearance, these vents perform just as well, but are less likely to get damaged, and they definitely don’t catch the vacuum or a mop.
And to their delight, we proposed to remove their vertical vents, which drove them nuts. With a little duct work done by their HVAC Contractor, the ducts were vented to a different area, and up through the floor. Another pet peeve of theirs, they quickly added those to our To Do list. Again, we installed recessed vents, which gave it a totally tailored, upgraded look.
Other holes were eliminated where a cable wire was drilled thru the floor.
An unsightly stain was removed by sanding and bleaching, so we didn’t have to replace those boards.
The clients apparently had a bar in the corner of their family room that left a large dark stain when it was torn out. Not going back we were asked if the stain could be removed. Confident that sanding would remove most of it, we also said we could try bleaching it so we wouldn’t have to remove those boards. Also, chances are if they choose an updated stain a slightly darker stain may absorb any lingering stain left after our efforts. Thankfully the stain was removed and we could keep moving forward with the other repairs.
A doorway wall was moved, leaving a void that needed to be fixed and repaired so you would never knew it existed.
Just beyond the bar area in the door area to the kitchen, a wall was moved. Once it was cut back there was an small area where there were no boards. Instead there was a rectangular area of open, exposed subfloor. Sometimes the contractor or homeowner will plug the hole, and usually when that happens the repair looks like ‘Lip Stick On a Pig.’ But in this case nothing filled in the area, so the clients were happy that we said we would weave random board lengths so it would blend naturally into the floor as if it was never any different.
To clean up a knife slice we installed a larger transition near the kitchen tile.
As mentioned before, we installed a wider transition to cover up a sheet rock knife slice that looked sloppy, and would not sand out
Next the vertical wall flush vents were relocated to the floor.
Removing them from the wall and recessing them in the floor makes them much less noticeable, and more functional. While they blend into the floor they can be opened or closed, won’t break like other flush vents, and they don’t cause a problem when you are cleaning the floor. This way a mop, micro fiber mop or vacuum attempt won’t get hung up on them.
We installed a transition inside a pocket door to tidy up a gap in the floor.
Trying to find space they removed a wall, and again there was a void where the subfloor was exposed. Not in need of board weaving, a simple transition was laid against the edge of the hallway, so the open area was tidied up there too. And another plug or board was inserted toward the end of the hall.
And perhaps the most important task to make sure our client loves her stain color now and for years to come!
As discussed, this client was very unsure of the stain color she wanted. “Not too dark, not too gray, not too brown,” it had to be an even balance that allowed several highlights to pop thru. We carefully guided them to look at their favorites during the day, at night, and in several areas in their house. Also, near natural light, and in the darkest area, we wanted them to be comfortable with their color. Also taken into account, we wanted them to look at the samples against any new paint, or color palates of their new décor styles.
All this as they looked at their favorites, they just didn’t have that one that was the ultimate choice. Again, as we promised we would put the samples on their floor just before the sanding begun. But with significant indecision and a good amount anxiety, we offered as was conveyed earlier, to get permission to see one of their choices on a floor we recently finished.
Out meeting went well with the Shamong client. She discussed her thought process, and these clients appreciated the info and chance to see it in a large format. You could see the information and conversation was reassuring for our tentative client and her husband. They thanked us for the extra effort, and I sense it was exactly what they needed.
With just a few days for us to be ready to stain, our client went with her first choice, warm gray. She liked the classic gray, but with different lighting than the previous client, the warm gray stood out. Not long our client called, firm in her decision, she has never looked back since!
Nervous about hardwood floor refinishing let us guide you step by step for a beautiful floor once again. Free estimates Call us at 609.953.0472 or contact us online.