

Historic Home Gets New Kitchen Hardwood Floors Installed
- Home Case Studies Historic Home Gets New Kitchen Hardwood Floors Installed
 Decision was made to replace the old hardwood with new and finished in place to match
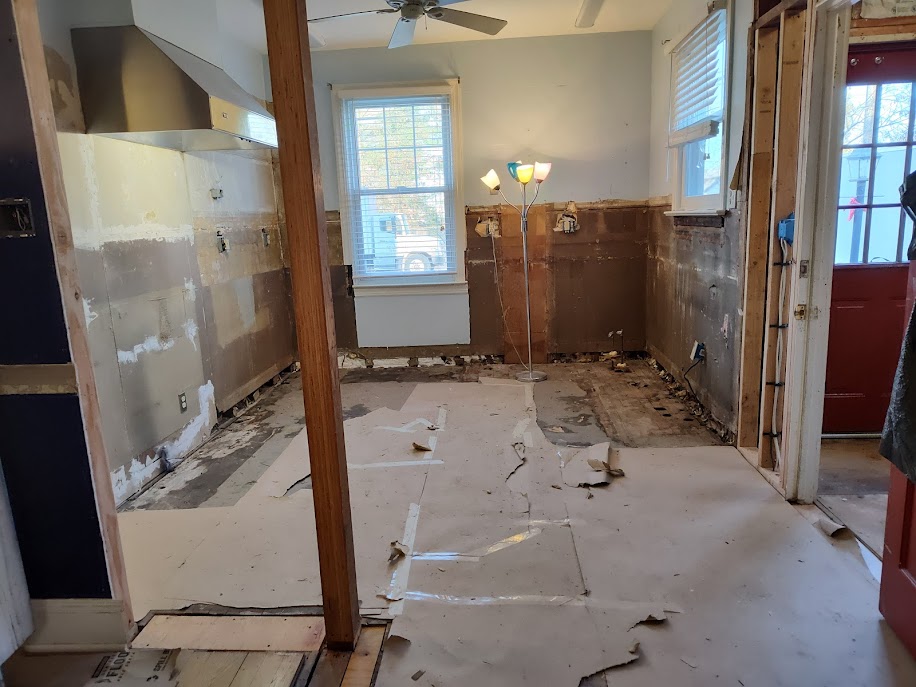 The new white oak wood is mostly installed
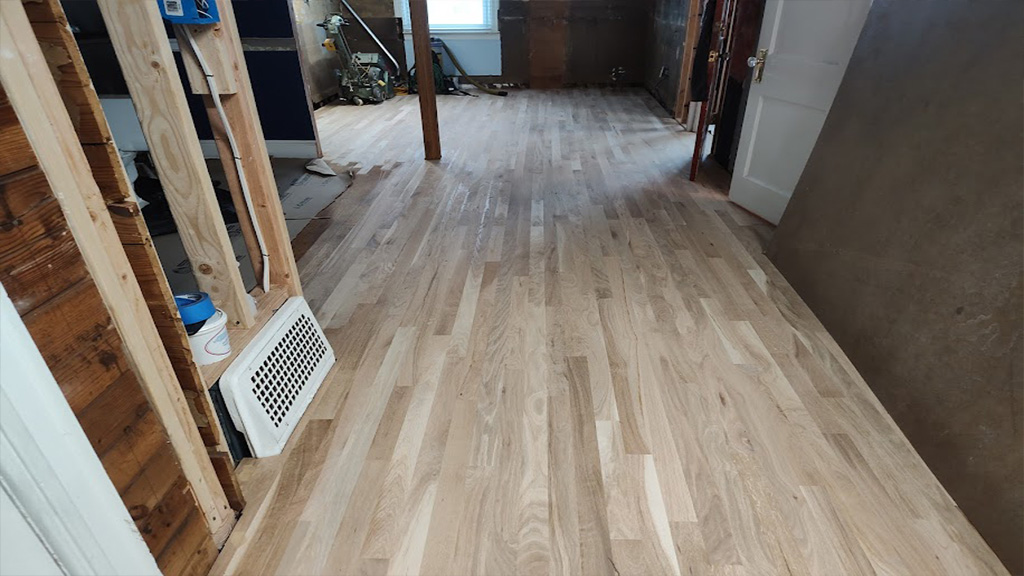 All nicely installed the floor is flat and quiet
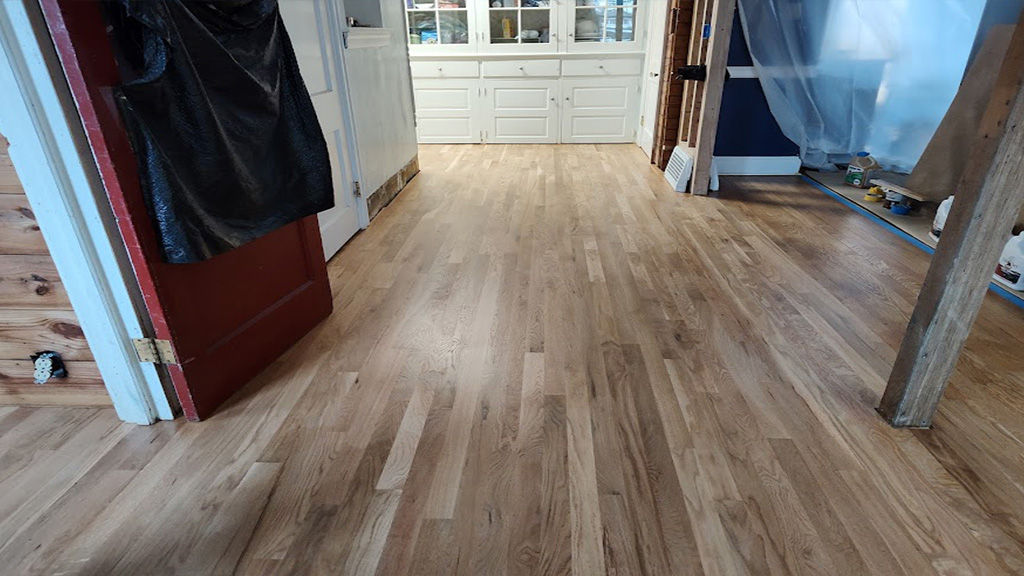
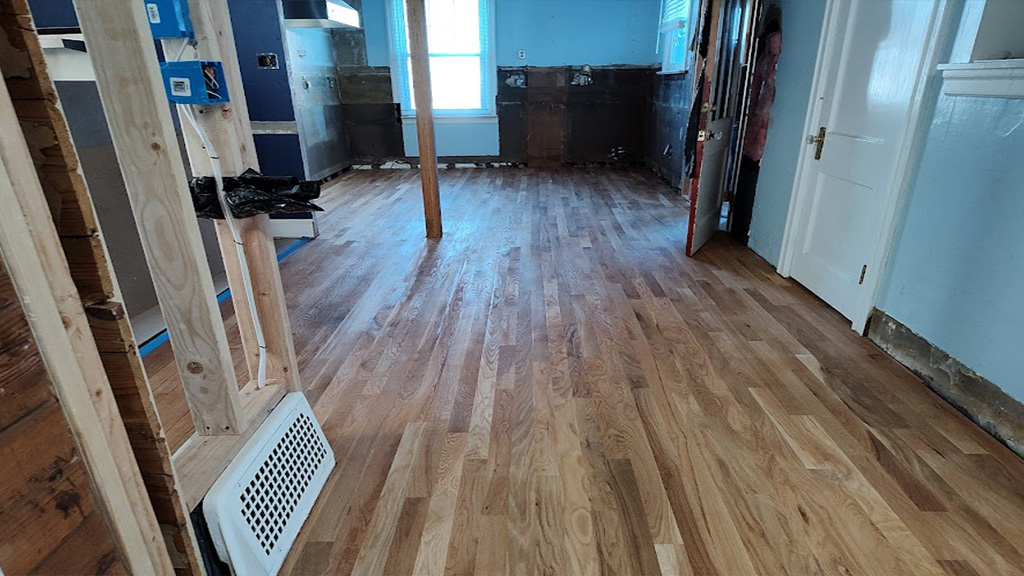 All stained and finished this white oak floor is gorgeous
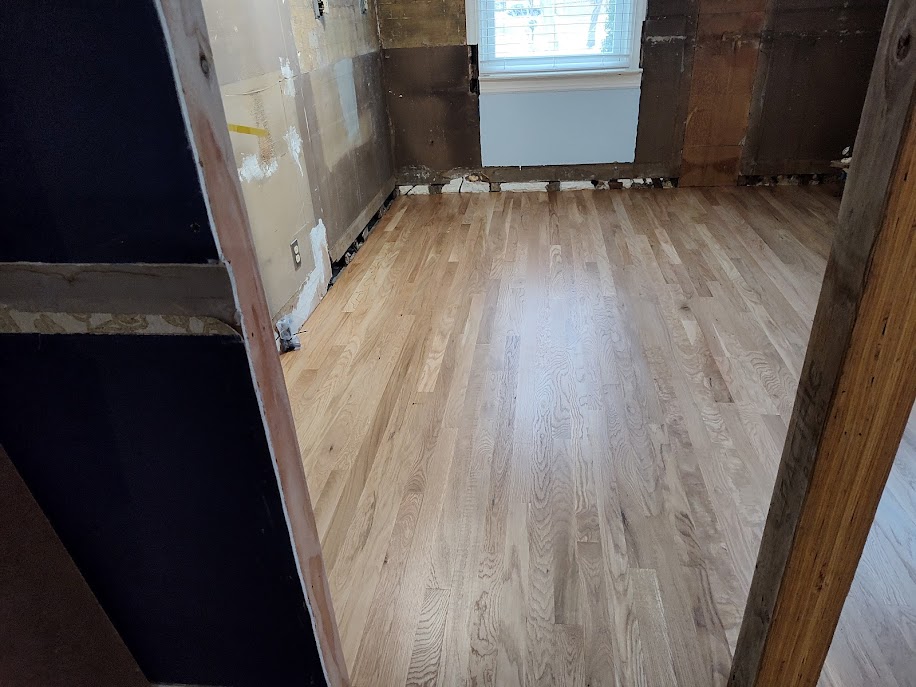 This is the kitchen white oak refnished
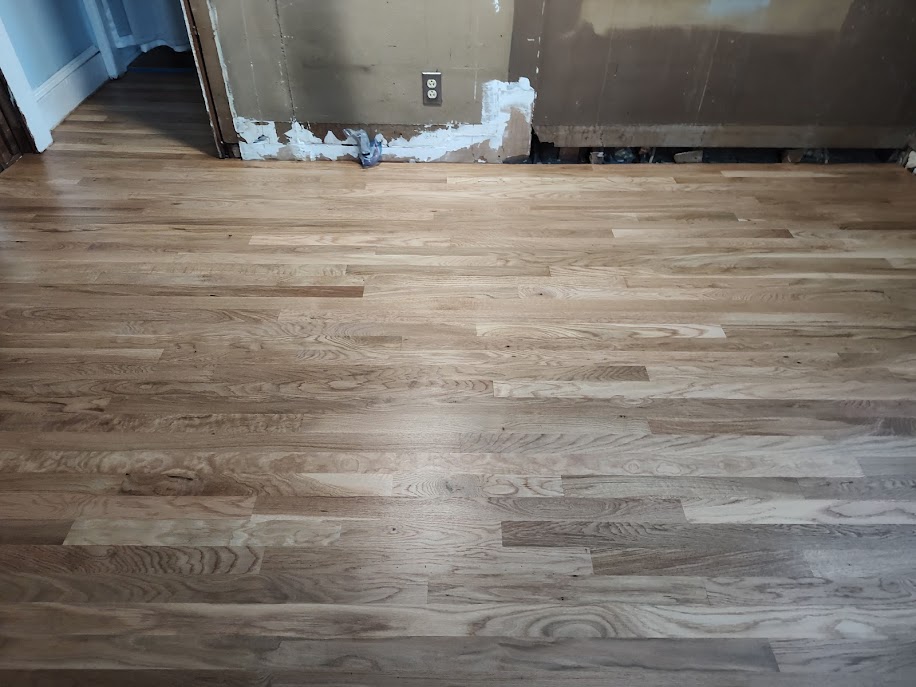 The white oak is stained and the light boards blend in perfectly
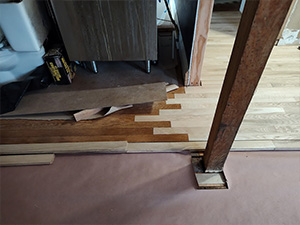
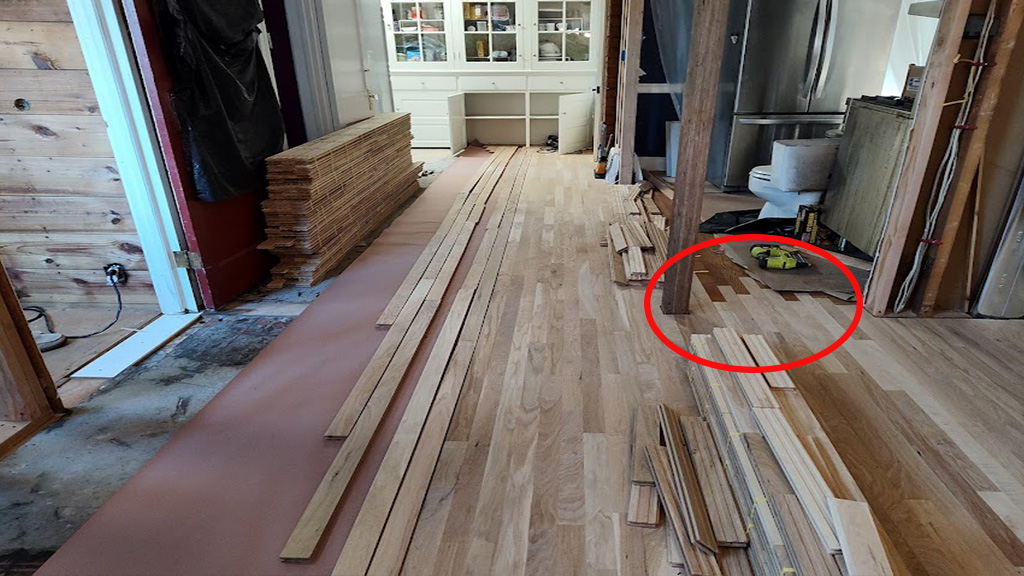 Choosing to randomly cut the old boards beyond the support beam, the new boards were weaved in.
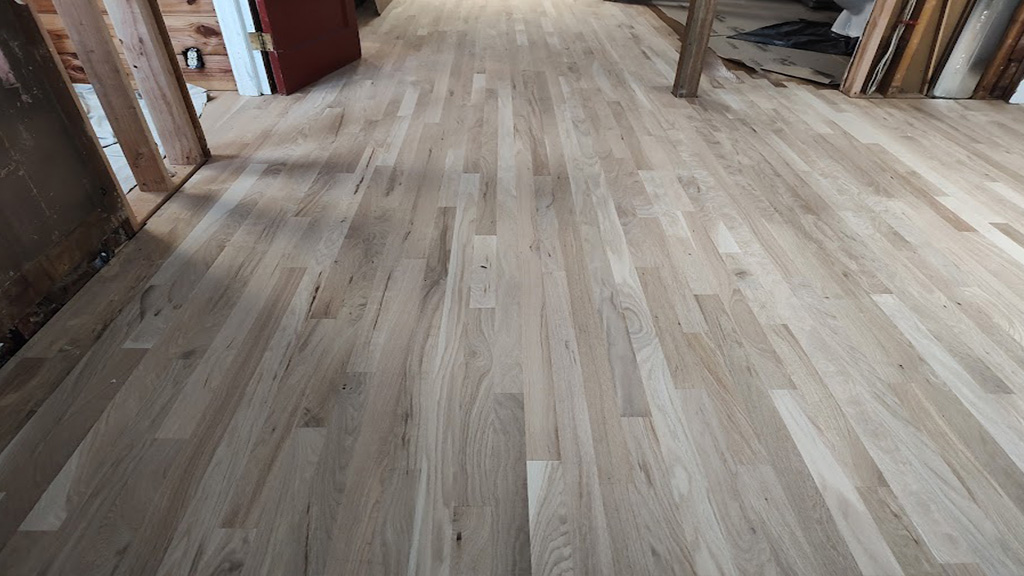
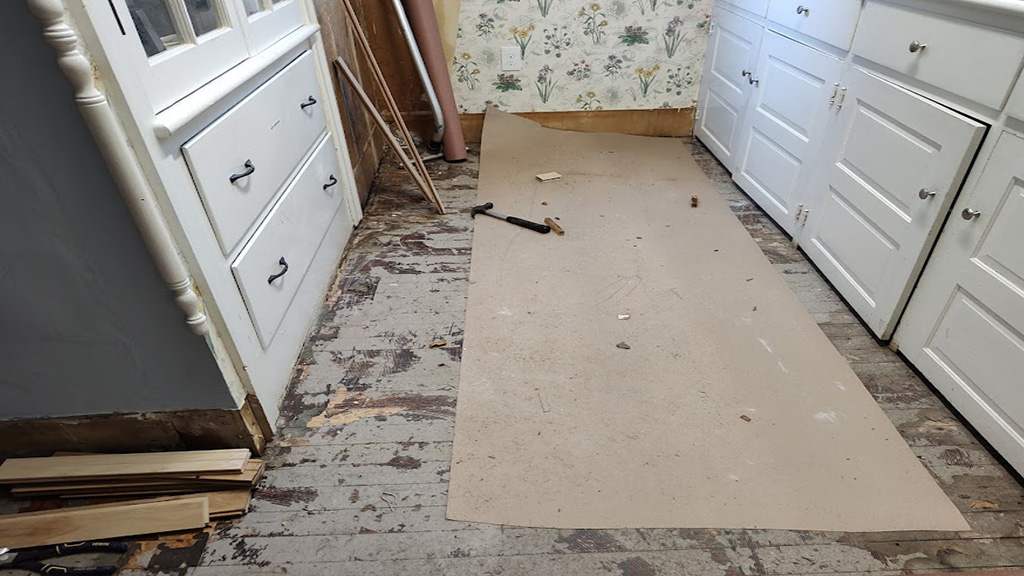 Here the pantry is ready for the new white oak floor
 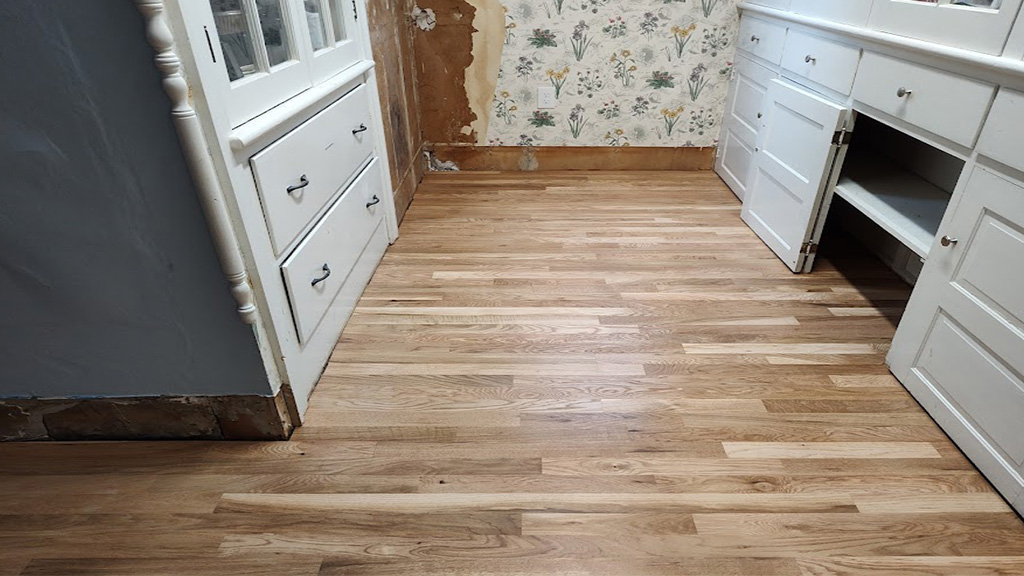 Look at how nice this floor is now
- Location Residence in Bordentown NJ
The problem
As with any older home renovations this old house had some leveling issues. And this was no exception. Because of it we decided it was better to replace the kitchen hardwood than to try and level the floor
The objective
- It included installing new hardwood floors in the kitchen, hall, bath and pantry
- It required weaving in boards in newly created wall voids with the full kitchen ‘gut’ done by the kitchen contractor
- The work was carefully completed after the cabinets were removed and the walls were modified, but before the new kitchen cabinets, appliances and counters were installed
The work
The kitchen guy got everything prepped, the cabinet removal, etc and the walls moved. We danced a little bit with the bath cabinet. Deciding to change it, we had to weave boards in to cover an additional void space from the different cabinet size. No biggie, we handled it. But moving on, the main challenge was the color match, and this was no exception. Despite some preparation we had to further caress the color tinting to bring it to a closer match!
The wood was installed, then the staining took a little effort:
- Some leveling took place
-
-
- Five of the boards weaved in the center of the room appeared really light. They stuck out like a sore thumb
- Those 5 were tinted before the seal and finish coats
- After color matching evened out the overall color, the floor was sealed and refinished
-
Instead of the boards stopping at the same point, they were artfully weaved in
The results
Running like clockwork, the project was completed and successful. Besides the weaving of the boards the only other challenge was to build or tint up the replacement boards to blend and match better. Not a rookie task, this took skill and thinking on your feet, which Marvin did perfectly!
In fact, now that the floors are newly installed the floor is really “tight.” There isn’t a peep or a creak. And with that in mind Chris commented the kitchen contractor better step up to get his work all tight, square and level too! Mind you, that is a tall feat when you are working in an historic home! But once again, Marvin nailed it!
Have a historic home that needs some hardwood floor love? We cater to and special in refinishing and or installing new hardwood floors as needed. Free Estimates! Call 609.953.0472. Or Contact Us online and we’ll reach out!